Dev Diary- Silent Dream Part 3
Windows 10 Version
This is a very special episode of dev diary where we discuss going through the process of adding UWP (universal windows platform) features to the Unity game Silent Dream. Some aspects were pretty simple, some were more complicated. I even ran into some completely unexpected issues that took me a while to solve and went nowhere! 😊
UWP Plugins for Unity
First thing’s first, I had to download the correct plugins for Unity. The github for the plugins is here.
Change the variables as directed in the github instructions above. Make sure they’re referencing your version of Unity and nuget. Make sure you’re using Visual Studio 2015. Install Core plugin to use for live tiles/notifications when you run build.ps1. Silent Dream only had notifications in the game so we only needed to install the Core plugin. Follow the github for further instructions. Package will be made in the downloaded Unity Plugins for Windows 10 github folder “UnityPackages”. Import that package into unity. Assets -> Import Package -> Custom Package. NOTE: When building your Unity game for the Windows Store, make sure you do not already have a Windows Store build in that folder. They do not completely overwrite each other and therefore will not run.
Building Your Game
If you haven’t already, go to File -> Build Settings, and switch platform to the Windows Store. I submitted to the Windows 10 store so I switched the SDK dropdown to support Windows 10. You also have to make sure when submitting to the Windows store, that you have the appropriate logos and splash screen. See pic below.
 Make sure you have a logo
ISSUE: Icons not part of the payload in Package.appxmanifest.
RESOLVE: After seeing the build fail in VS, I manually went and deleted “scale-100” out of the URI it was referencing. The picture below shows how to create an app package to submit to the store as well as the URI under “Store Logo” in the Package.appxmanifest.
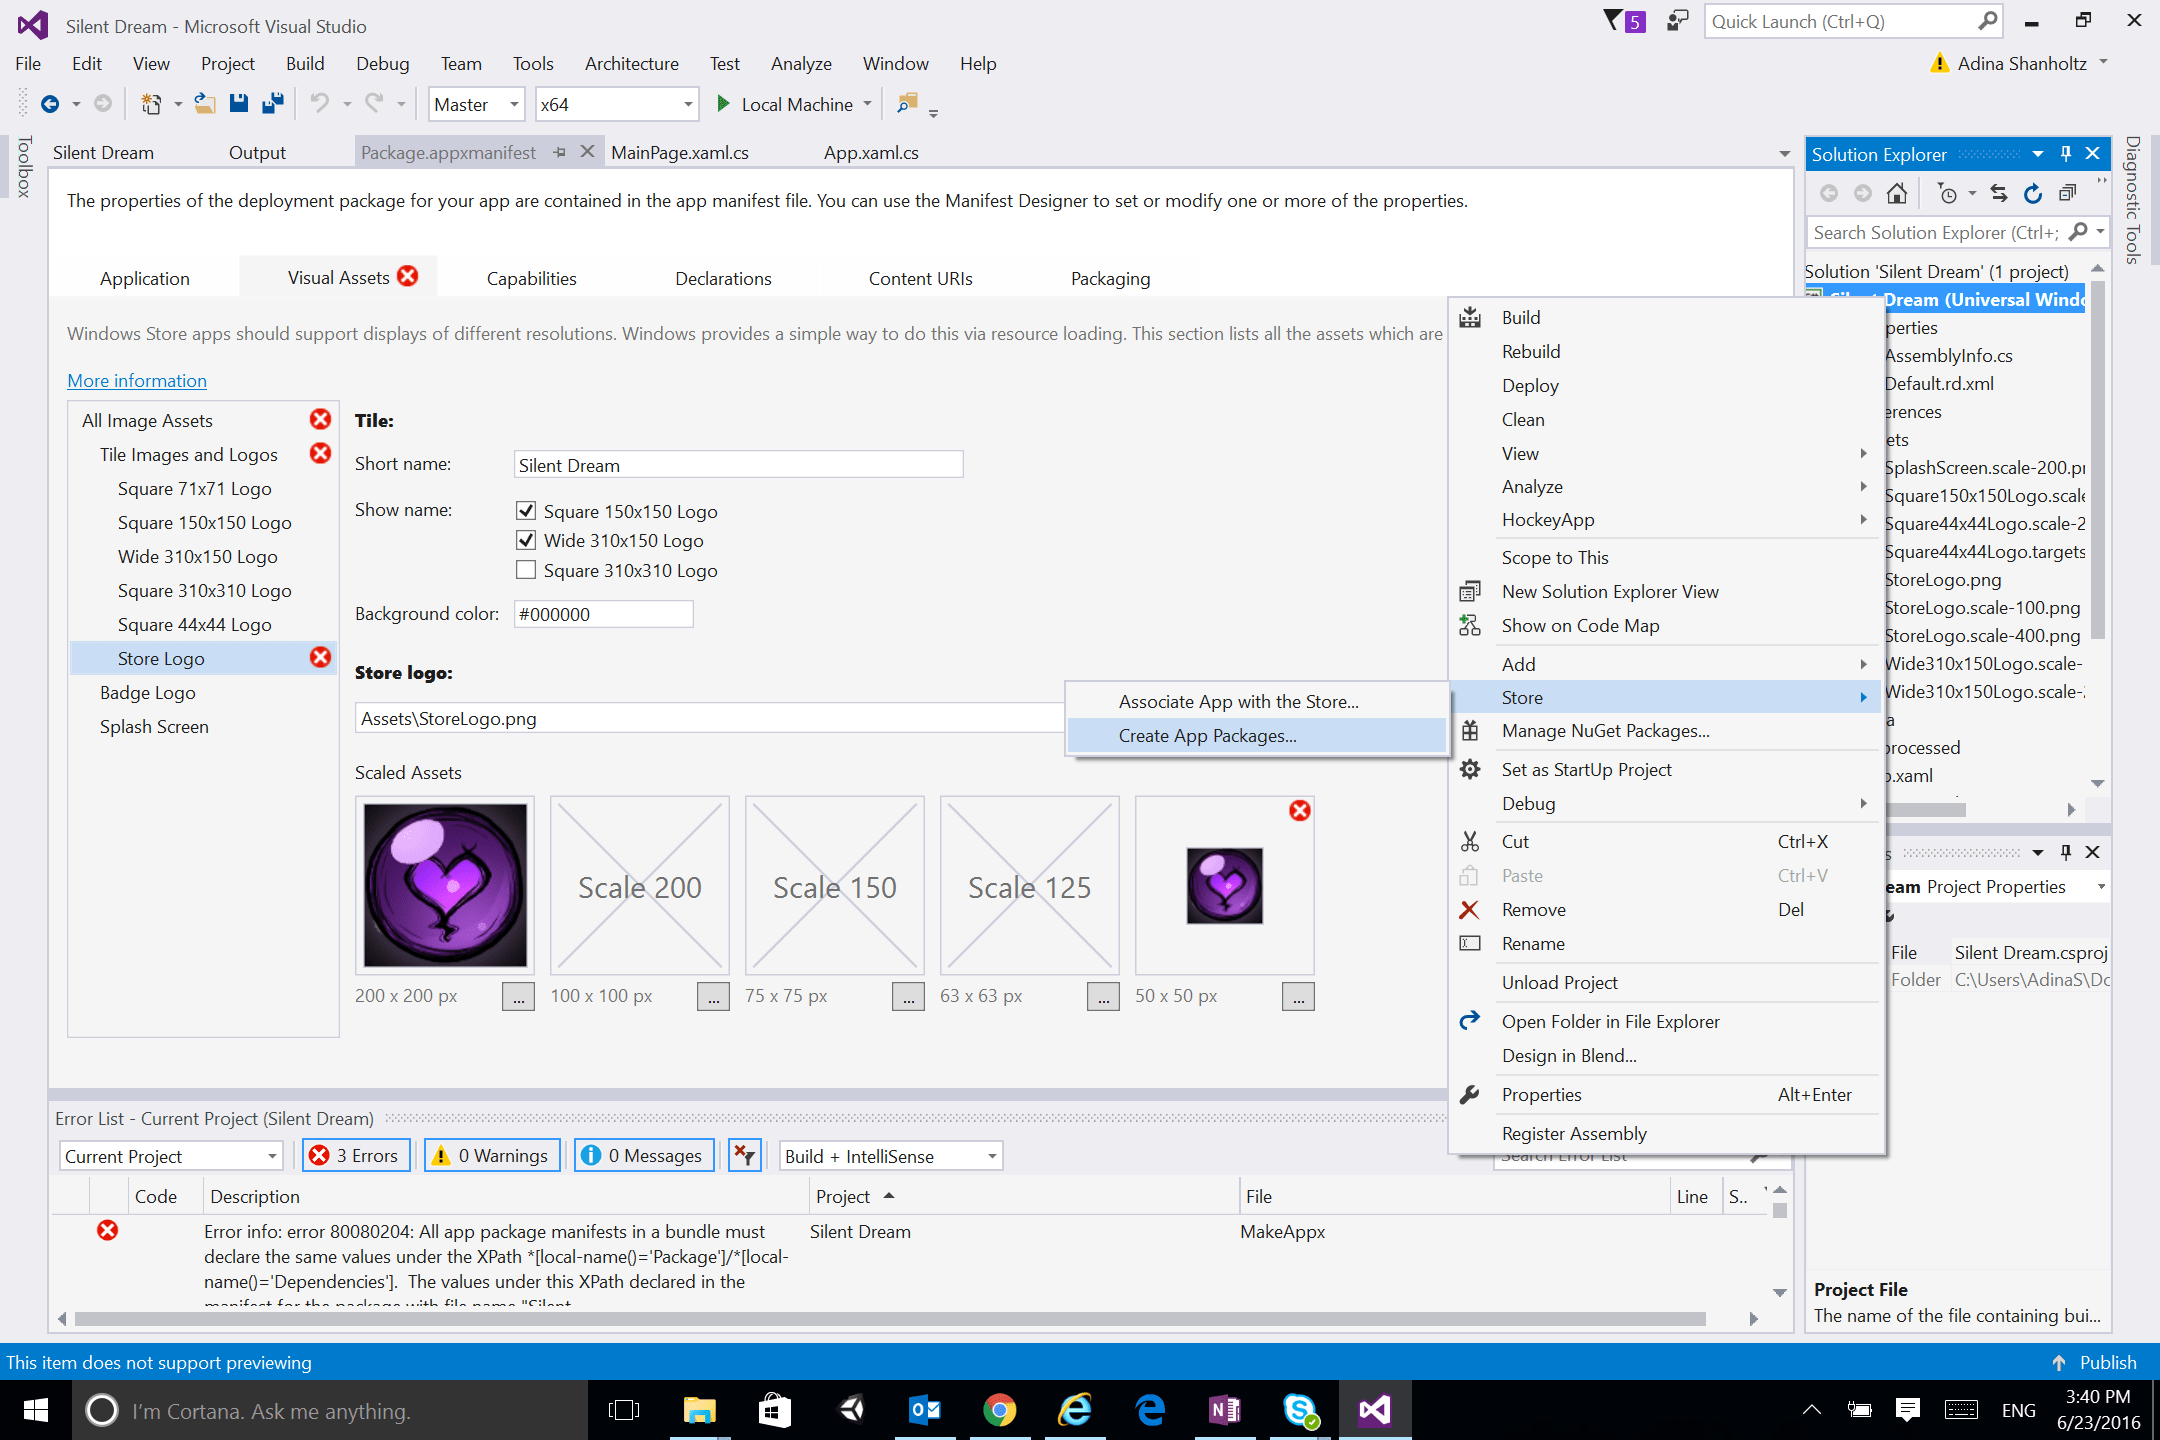 Creating an app bundle
ISSUE: Package acceptance validation error: This package wasn’t built for submission to the Store. Make sure you’re uploading a Release build with the .NET Native tool chain enabled.
RESOLVE: The bar below the menu bar at the top has a dropdown that says “debug”. Switch that to Master when you create your app bundle.
Change from Debug mode into Master
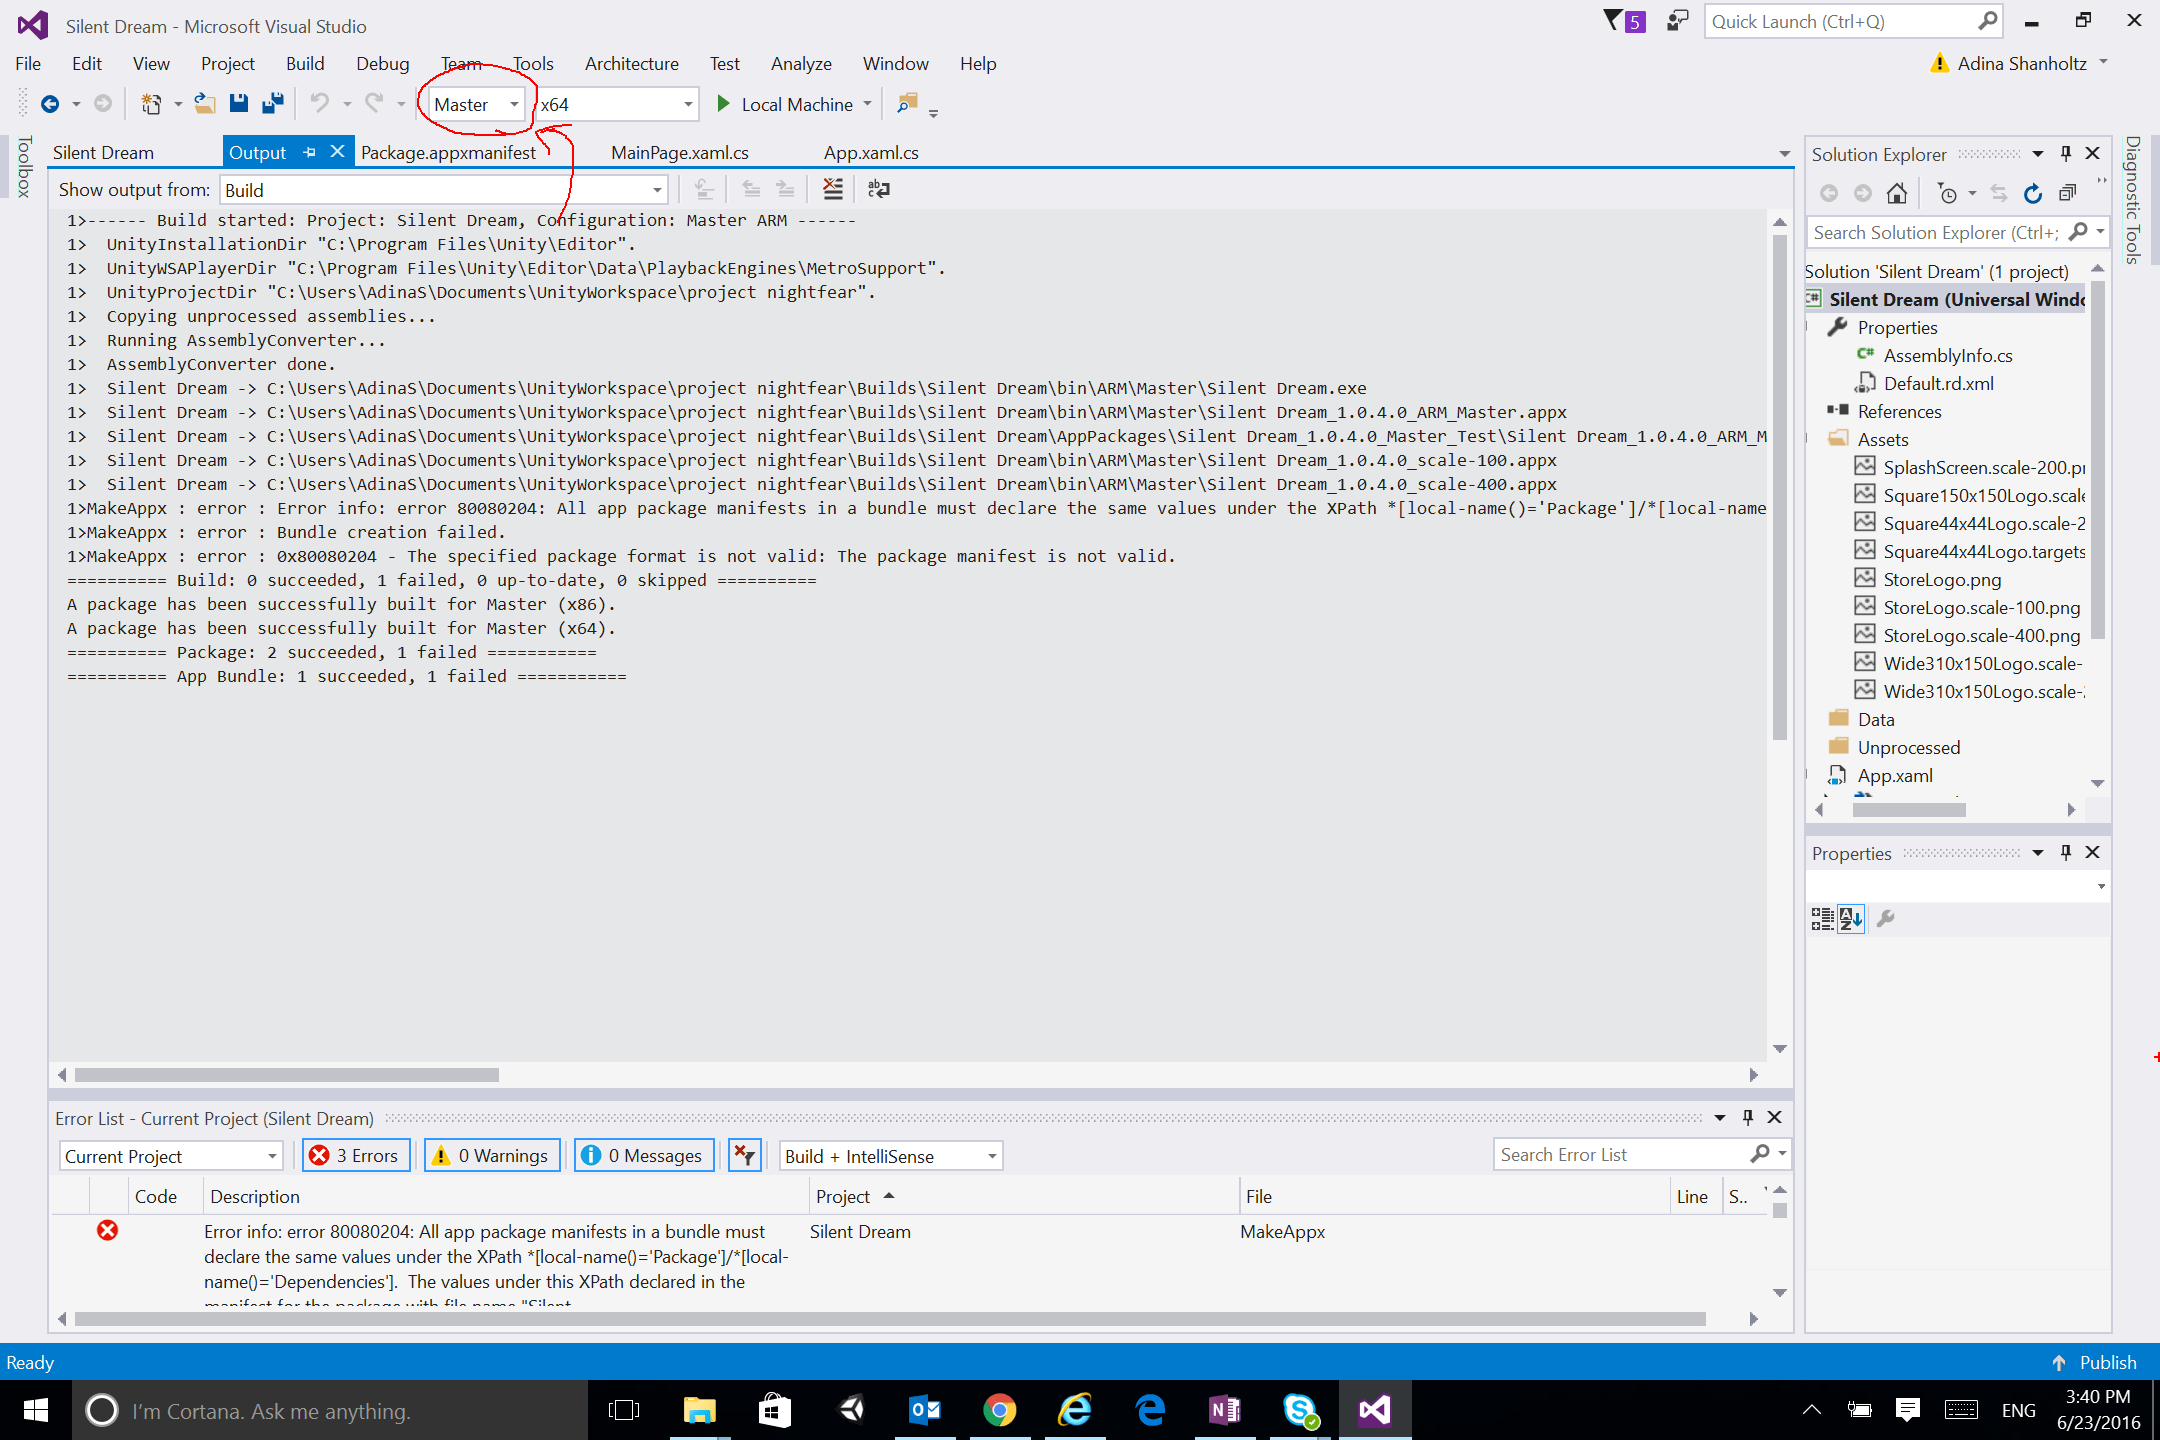 Change from Debug to Master
ISSUE: When running Windows Application Certification Kit (WACK), it fails on APIs.
RESOLVE: You changed from Debug to Release instead of Master. NOTE: THIS DID NOT WHOLLY FIX THE PROBLEM- UPDATE TO COME.
WACK failure on API test
Once you create your app bundle (see issue 1 above), you can upload the bundle to your app submission in your Microsoft Developer account. If all goes well, you’ll be approved and have an app on the store!