FruitWarrior MR HoloLens Workshop
Let’s do something cool with Microsoft HoloLens, the world’s first self-contained, untethered head-mounted holographic computing device for Mixed Reality! Mixed reality blends 3D holographic content into your physical world, giving holograms real-world context and scale, allowing you to interact with both digital content and the world around you. This guide will walk through creating Fruit Warrior MR, which definitely has no relation to the game Fruit Ninja whatsoever. This project takes concepts from Mixed Reality Academy, mixed with assets from the MRToolkit to teach concepts such as HoloLens Gestures, Voice Commands, Spatial Sound, and Spatial Mapping.
Check out the finished game: 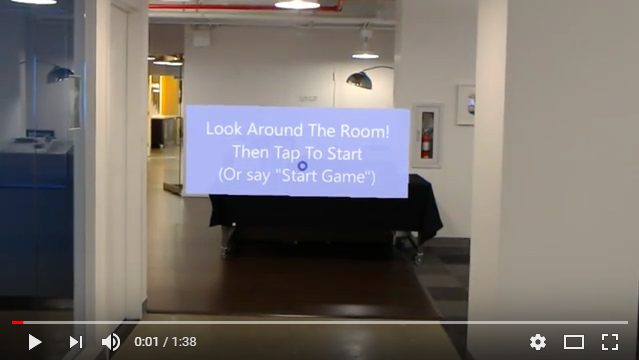
Github link to the finished project here.
Before Starting
Before starting, make sure you have all the tools installed from the Installation Checklist here. This includes Visual Studio 2015 Update 3, the HoloLens emulator if you don’t have your own device, and Unity 5.5. In addition, please download the latest HoloToolkit Unity package from their releases. At the time of writing this guide, that’s HoloToolkit-Unity-v1.5.5.0.unitypackage.
Setting Up
1. Make a new 3D project.
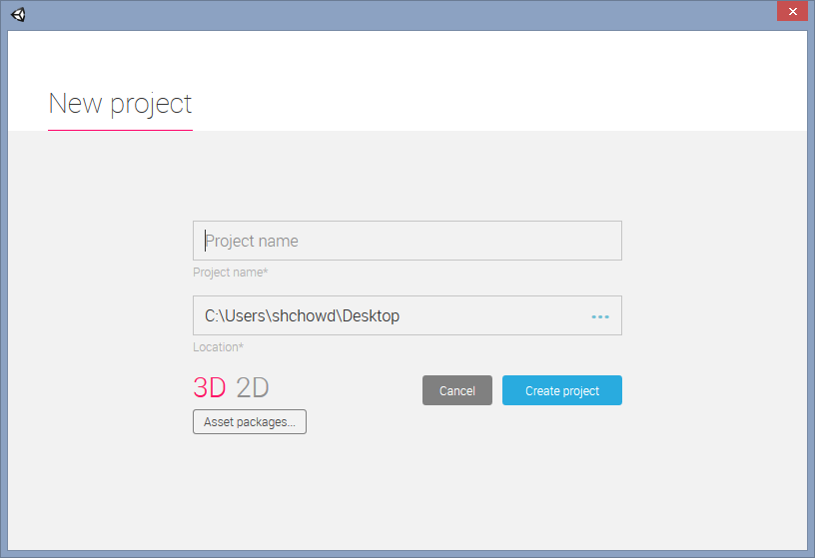 Unity - New 3d Project
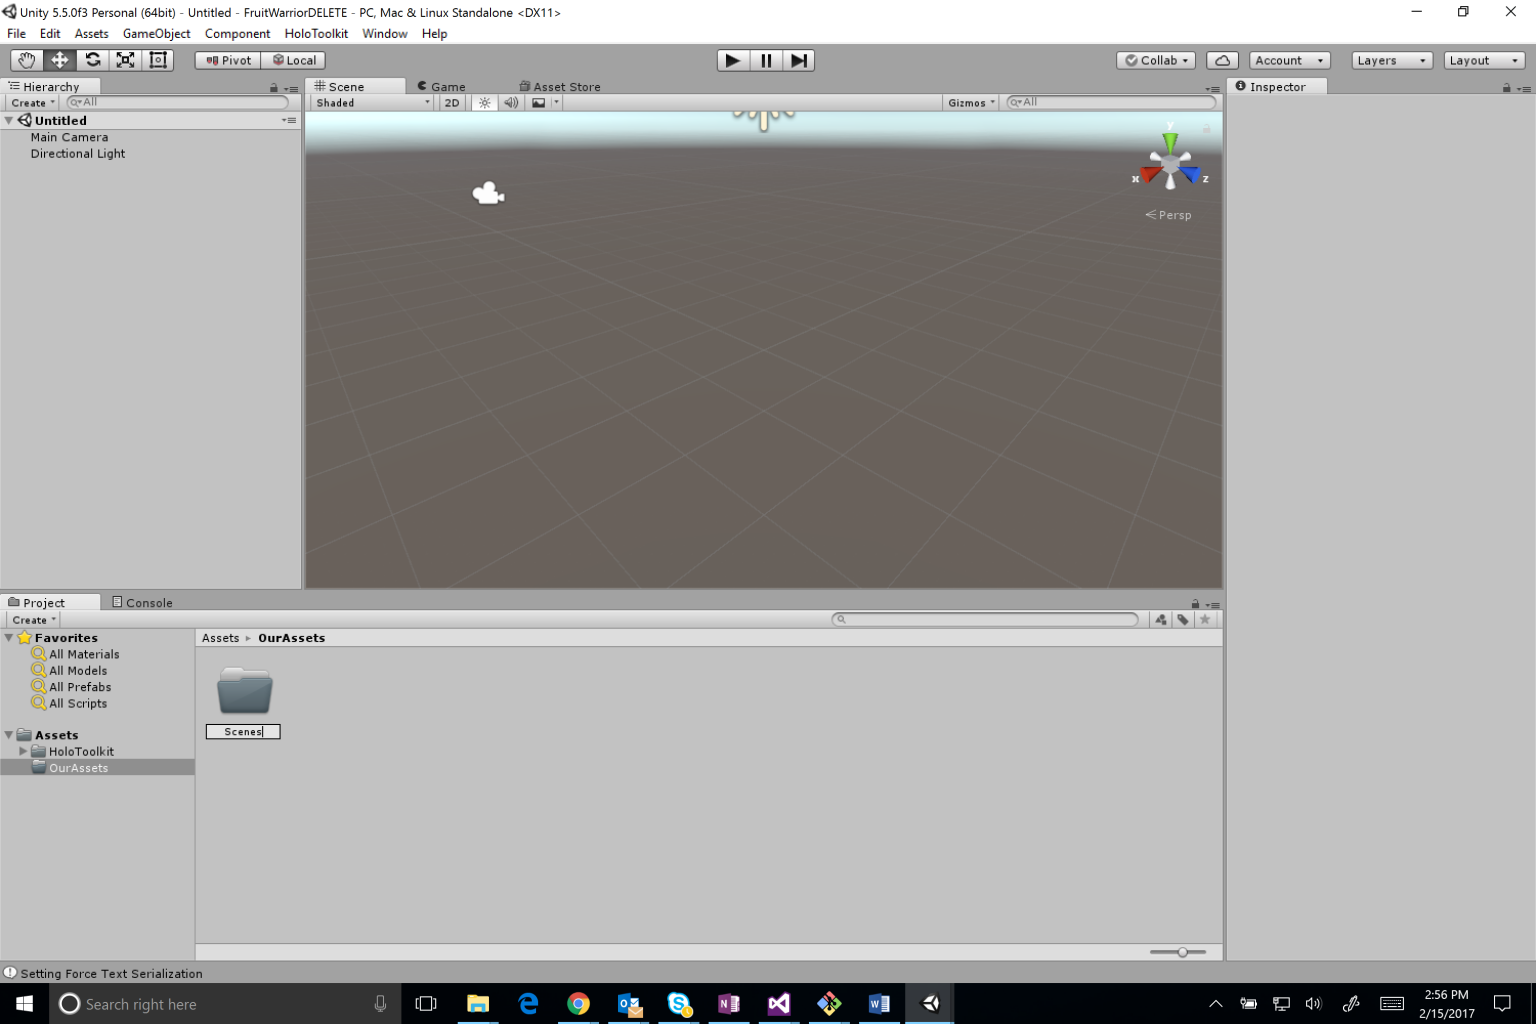
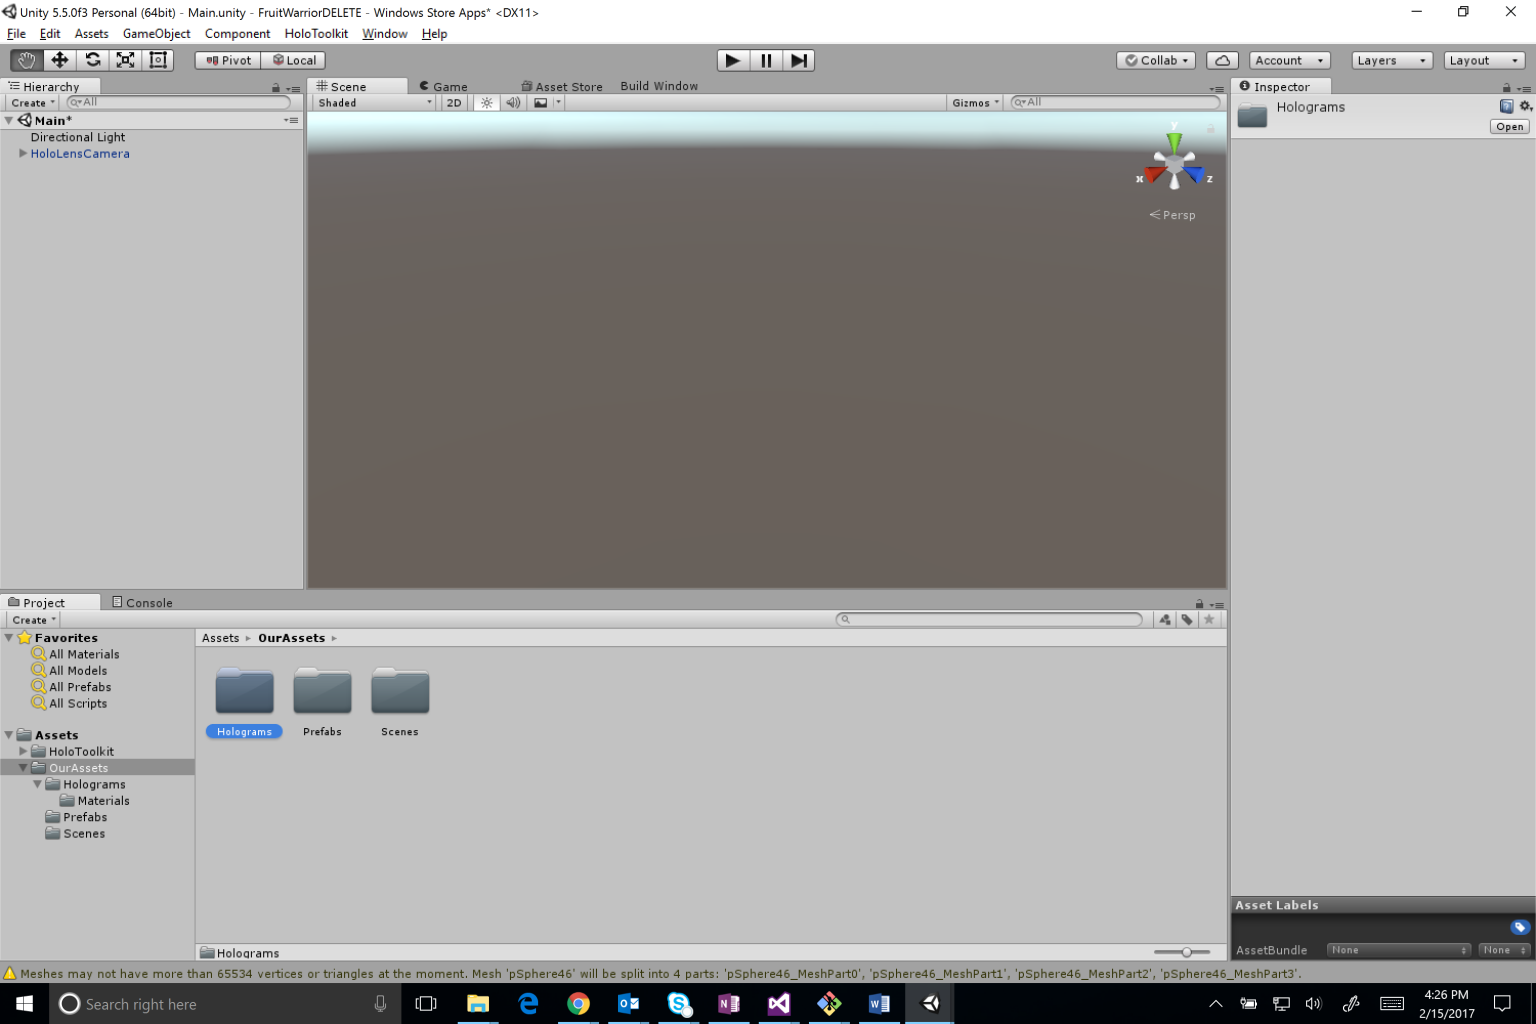
2. Make a folder called “Our Assets” to help organize what we make vs. what the HoloToolkit makes.
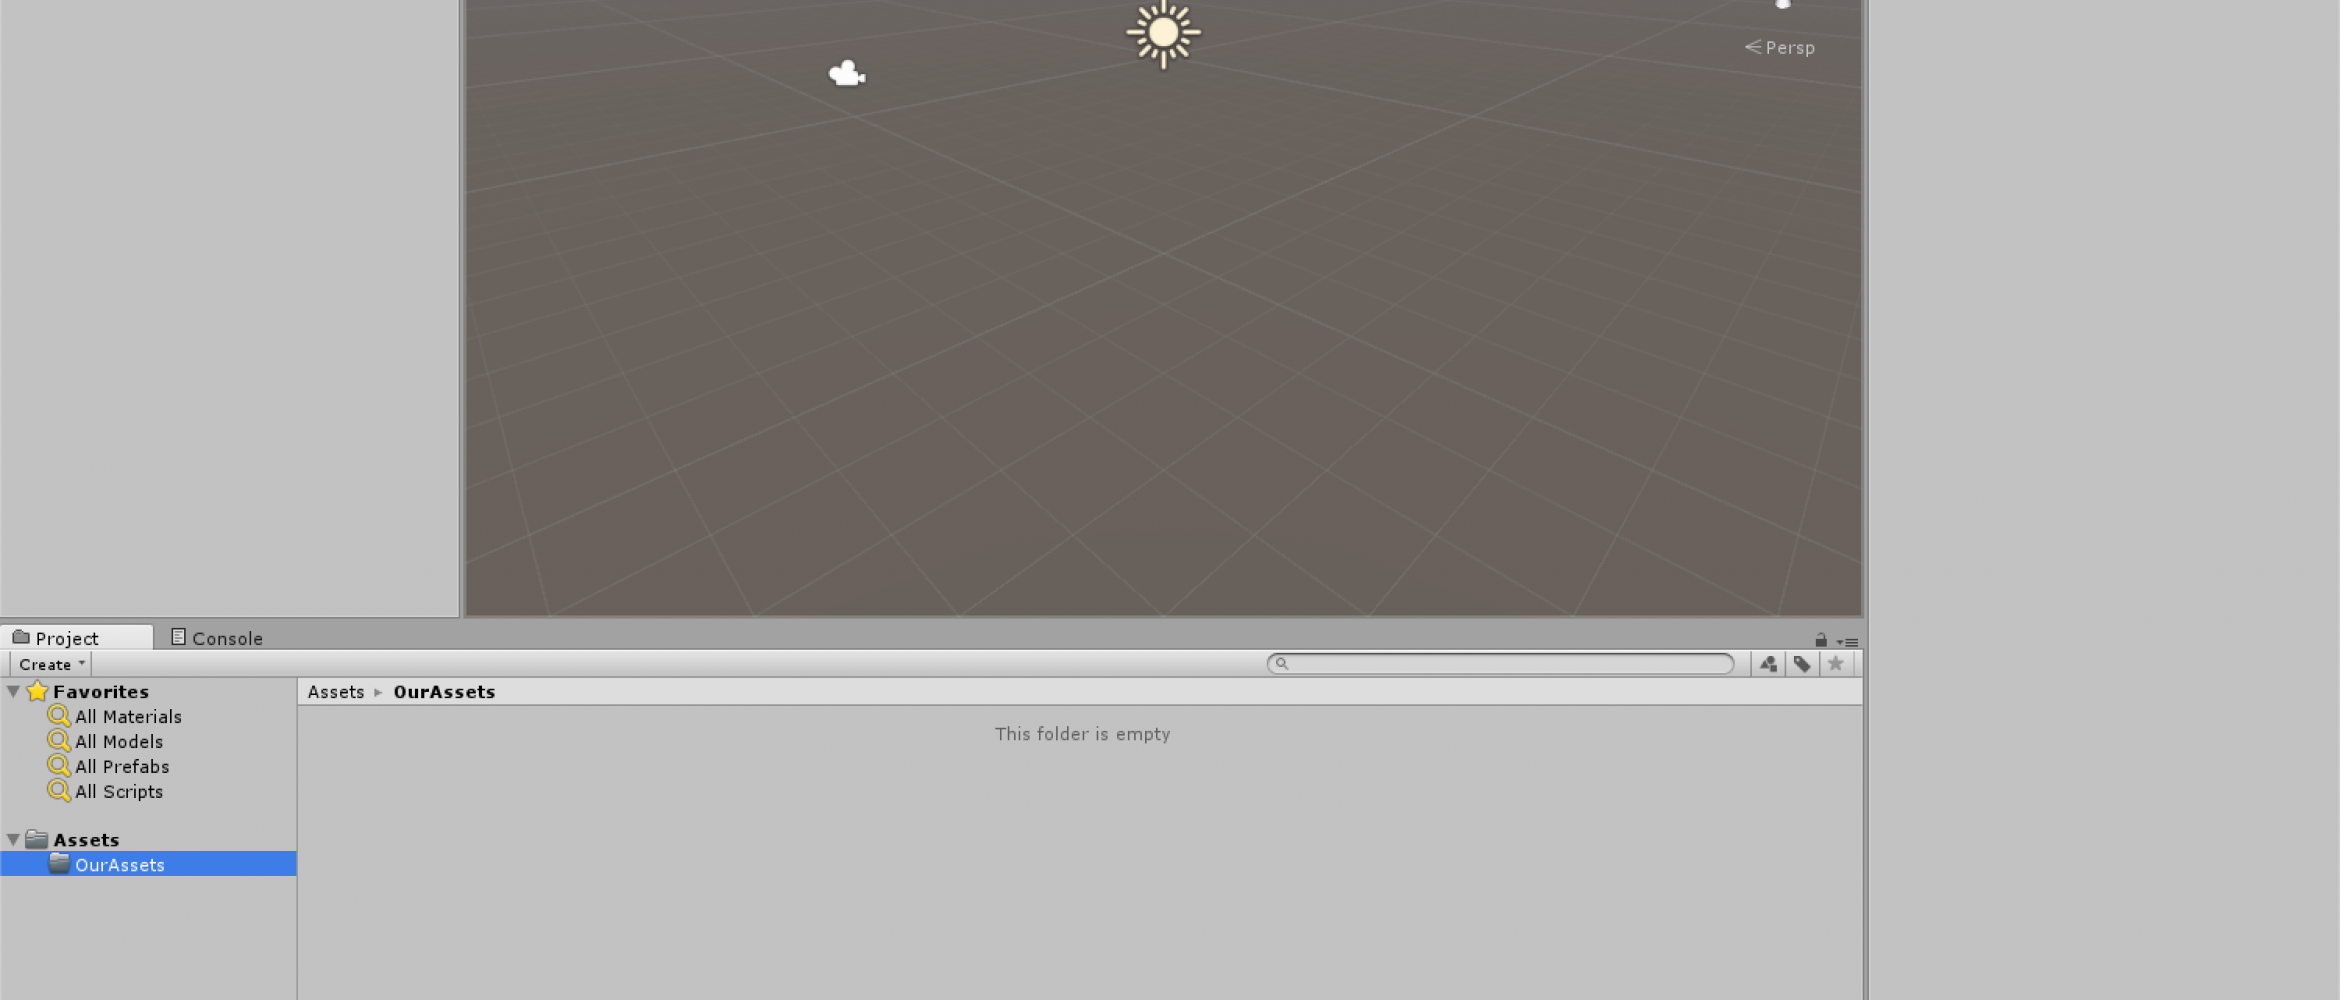 “OurAssets” Folder
3. Import HoloToolkit.
- Import all except HoloToolkit-Examples folder. (Or import all and delete HoloToolkit-Examples afterwards).
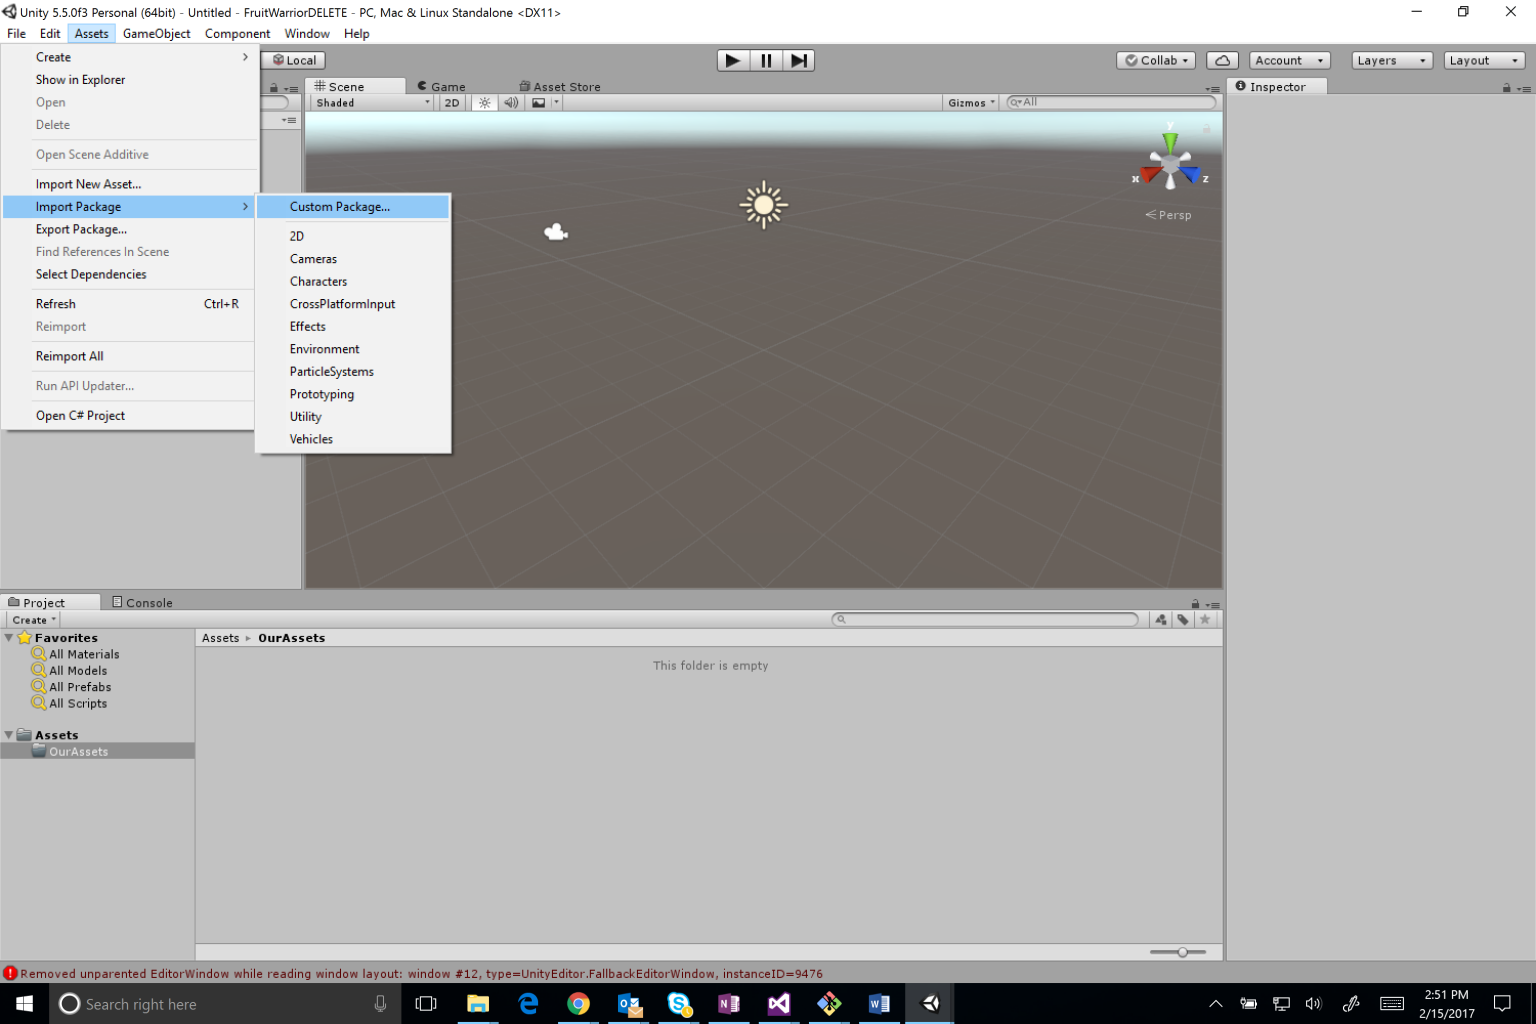 Importing HoloTolkit
4. Make folder in Our Assets named Scenes. Save Scene.
 Scenes
5. Delete default Main Camera. Drag and drop HoloLens Camera prefab into your Hierarchy Assets: HoloToolkit -> Input -> Prefab -> HoloLensCamera
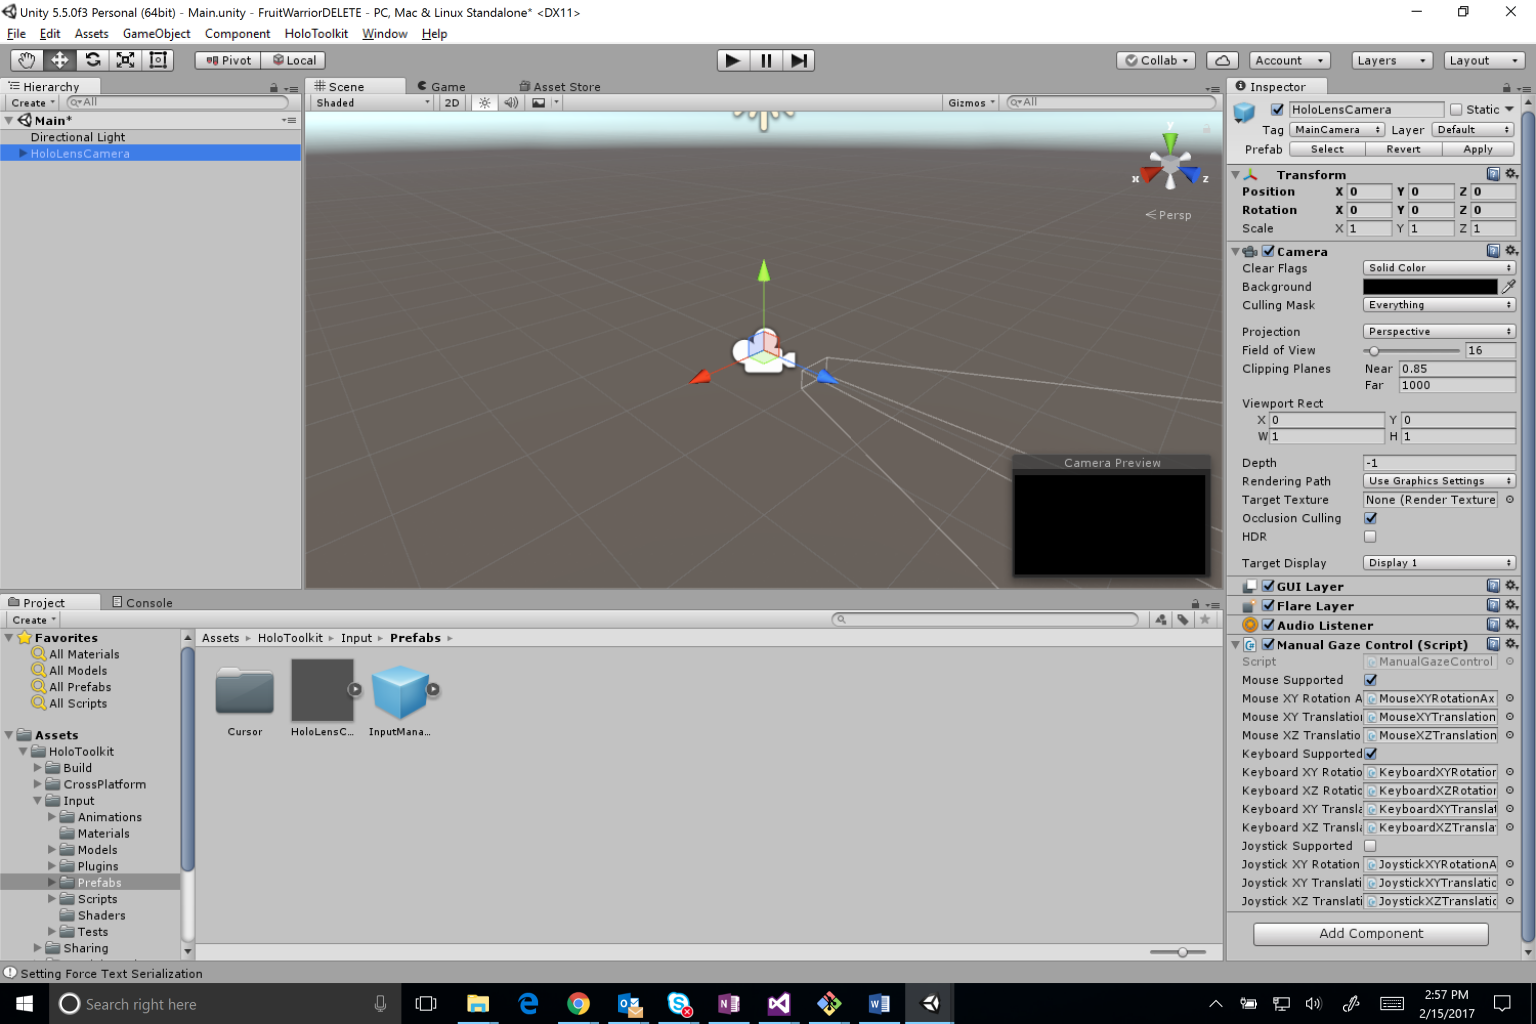 HoloToolkit Camera
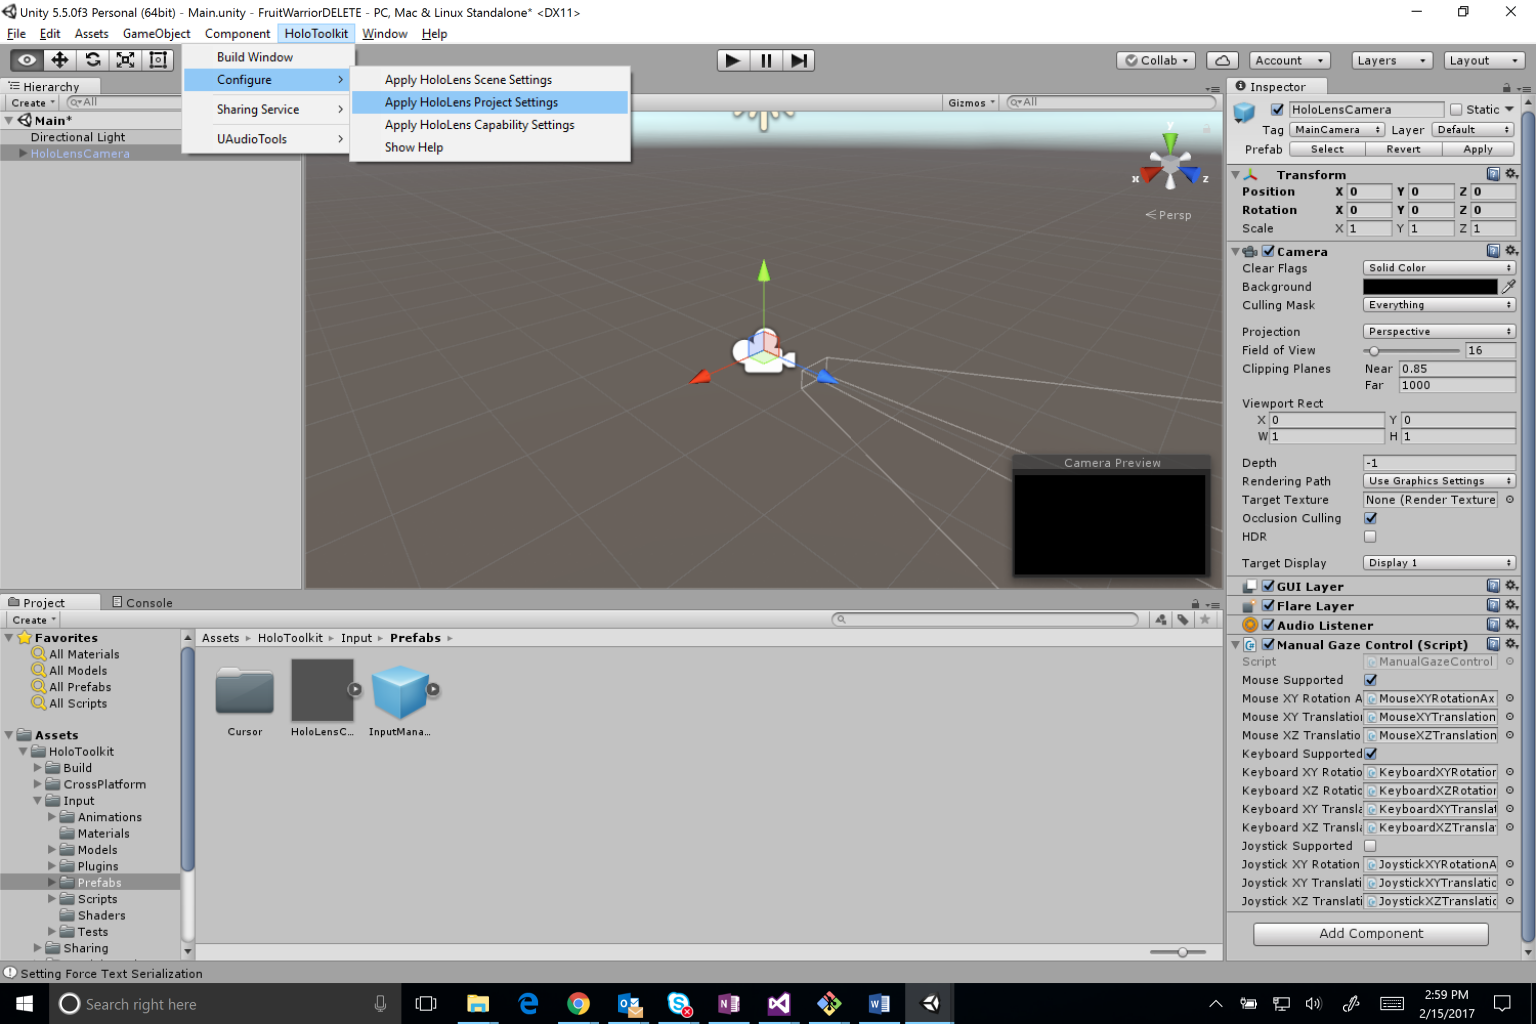
6. Configure Settings. These settings will set the frame rate performance to fastest, set the build target to Windows 10, set the build type to Direct3D, and enables HoloLens VR in Unity.
- Menu bar: HoloToolKit -> Configure -> Apply HoloLens Project Settings
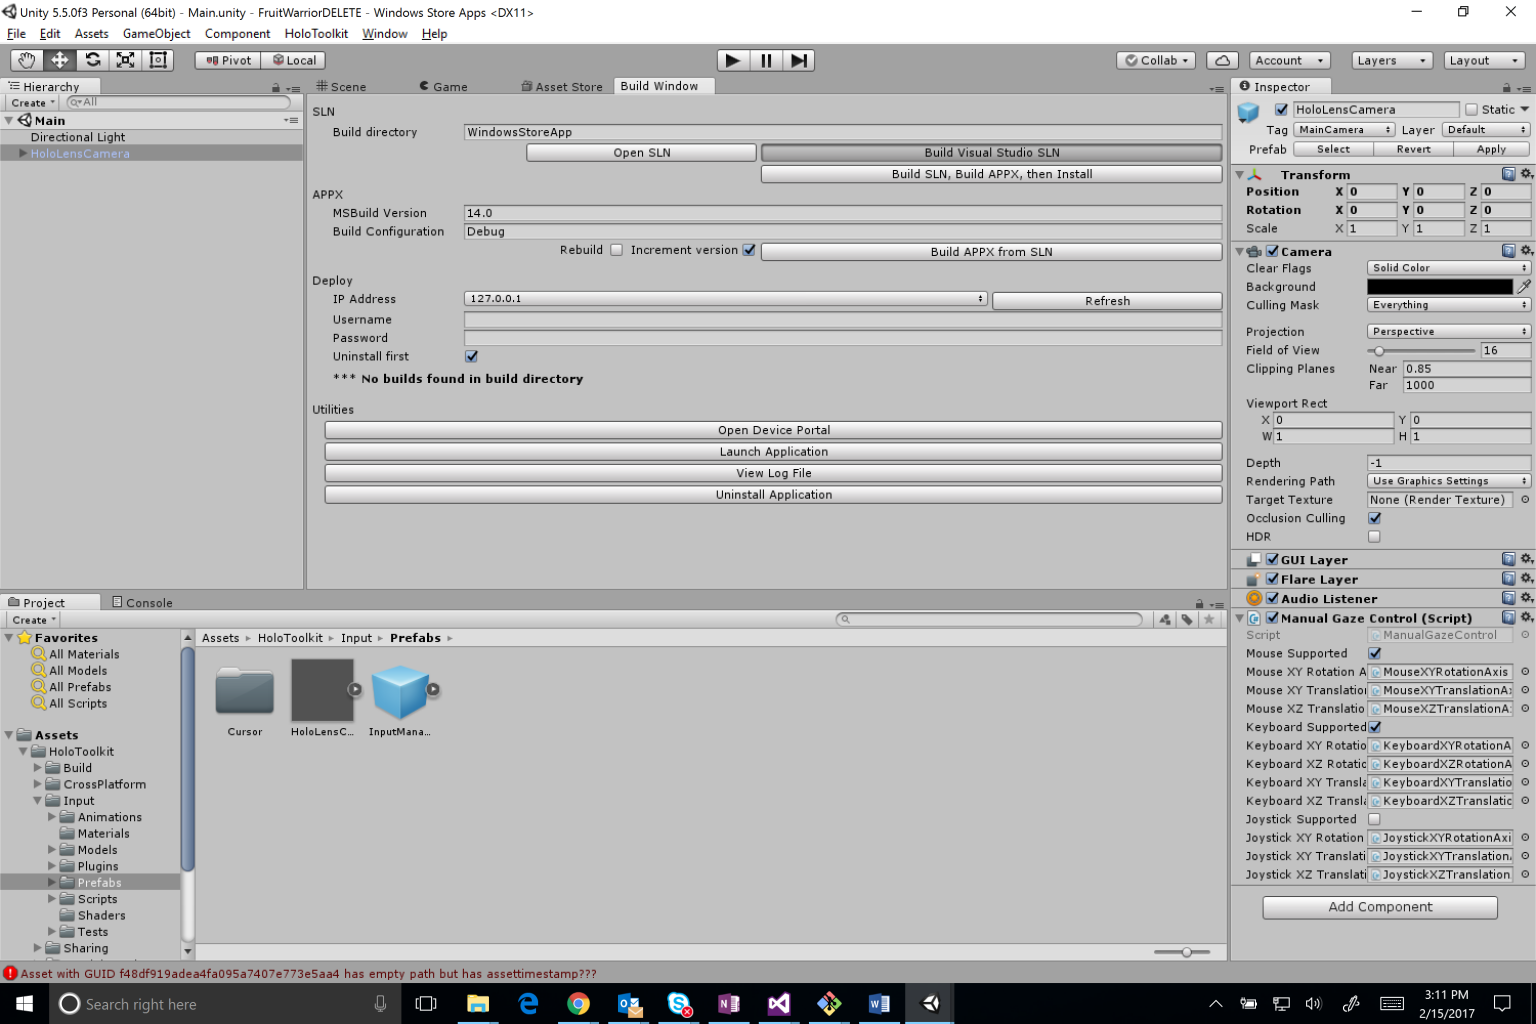
You should be testing your application either on the emulator or on a HoloLens device throughout this guide. First you have to build a Visual Studio solution, which you can do from the HoloToolkit Menu Bar -> Build Window. Then check out the Build and Deploy section here.
Import Holograms
1. You can feel free to use your own models.
- If you want to use my fruit objects (crafted by the talented Kat Park), download the finished version of this project. Scroll up to the top of this page for the link to the finished Github repo.
2. In this order:
- Drag the Holograms folder (FruitWarriorMR-master/Assets/Holograms) from the completed Github repo into the “OurAssets” folder in your Unity project.
- Then, drag the Prefabs folder (FruitWarriorMR-master/Assets/Prefabs) from the completed Github repo into the “OurAssets” folder in your Unity project.
- This order matters, as the Prefabs are relying on information about the models in the Holograms folder. They won’t render properly without it.
Gaze
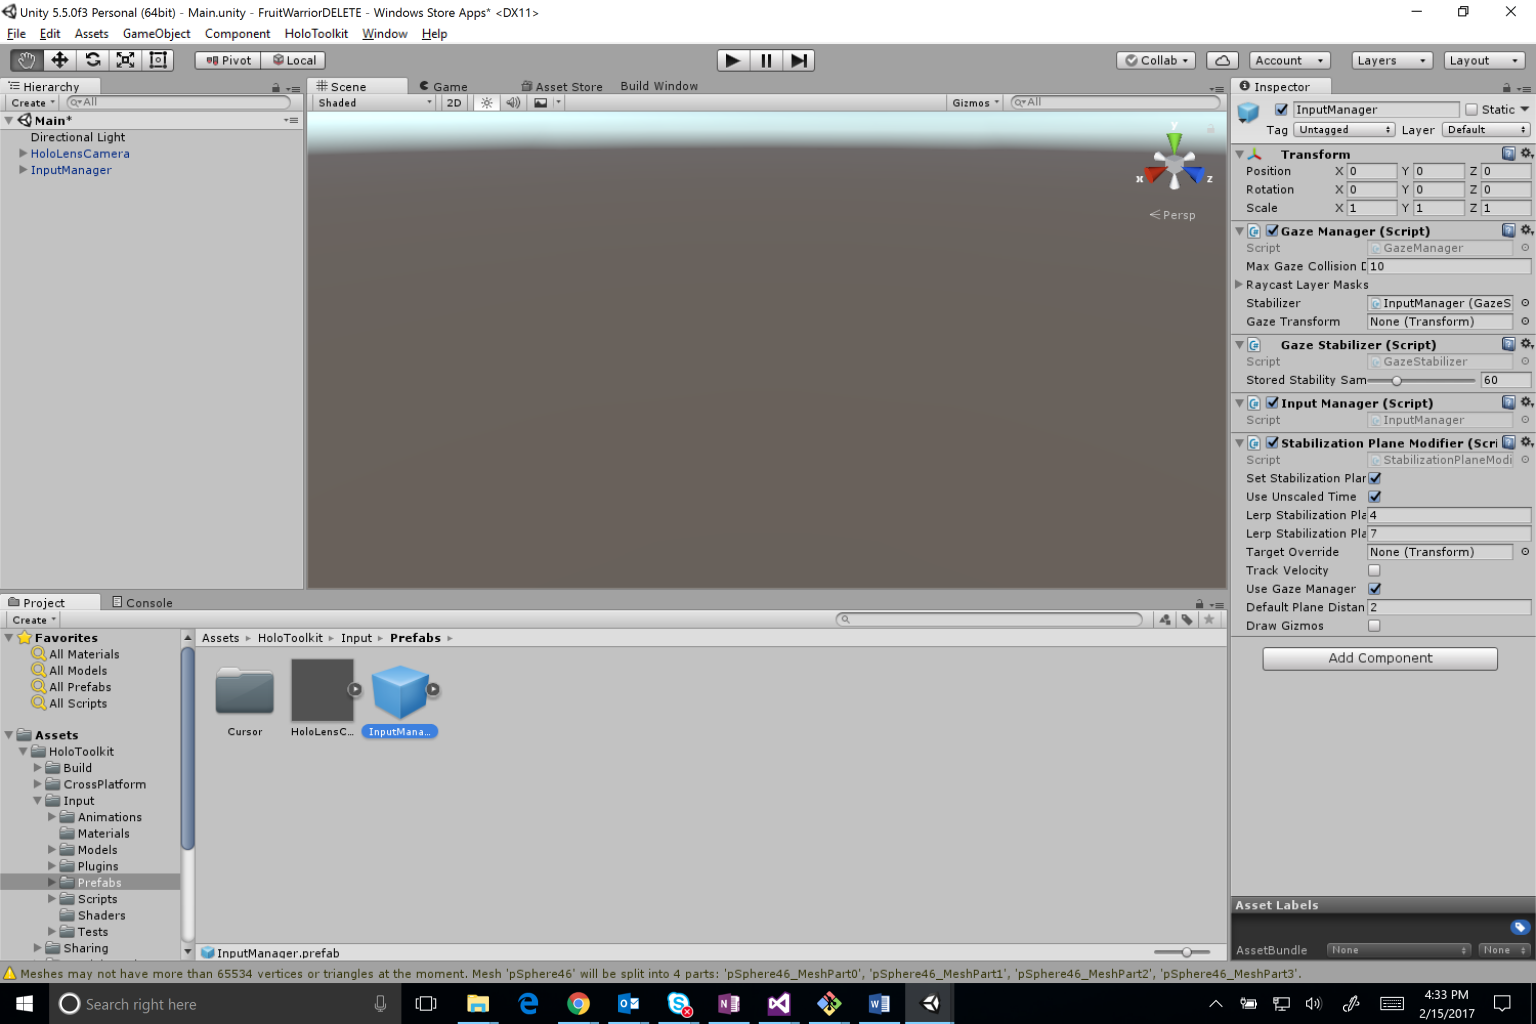
The HoloToolkit comes with a bunch of nifty things to help us with Gaze input. The InputManager prefab is a system that manages gaze and various input sources currently supported by HoloLens, such as hands and gestures. Importantly, it also includes a fake input source that allows you to simulate hand input when in the editor. By default, this can be done by holding Shift (left hand) or Space (right hand), moving the mouse to move the hand and use the left mouse button to tap. The cursor will follow the user’s gaze, with an additional HandDetectedFeedback asset to give feedback to the user when their hand is detected in the ready state.
- In the Assets: HoloToolkit -> Input -> Prefab folder, drag the InputManager prefab into your Hierarchy to input your Gaze Manager.
- In the Assets: HoloToolkit ->Input -> Prefab -> Cursor folder, drag the CursorWithFeedback prefab into your Hierarchy to input your cursor.
For more about Gaze, take the time to look at the scripts, specifically GazeManager.cs and InputManager.cs. Additionally, go through the Holographic Academy workshop about Gaze.
Spatial Mapping
The HoloToolkit has prefabs that let you use the HoloLens created mesh of your physical world, in your Unity project.
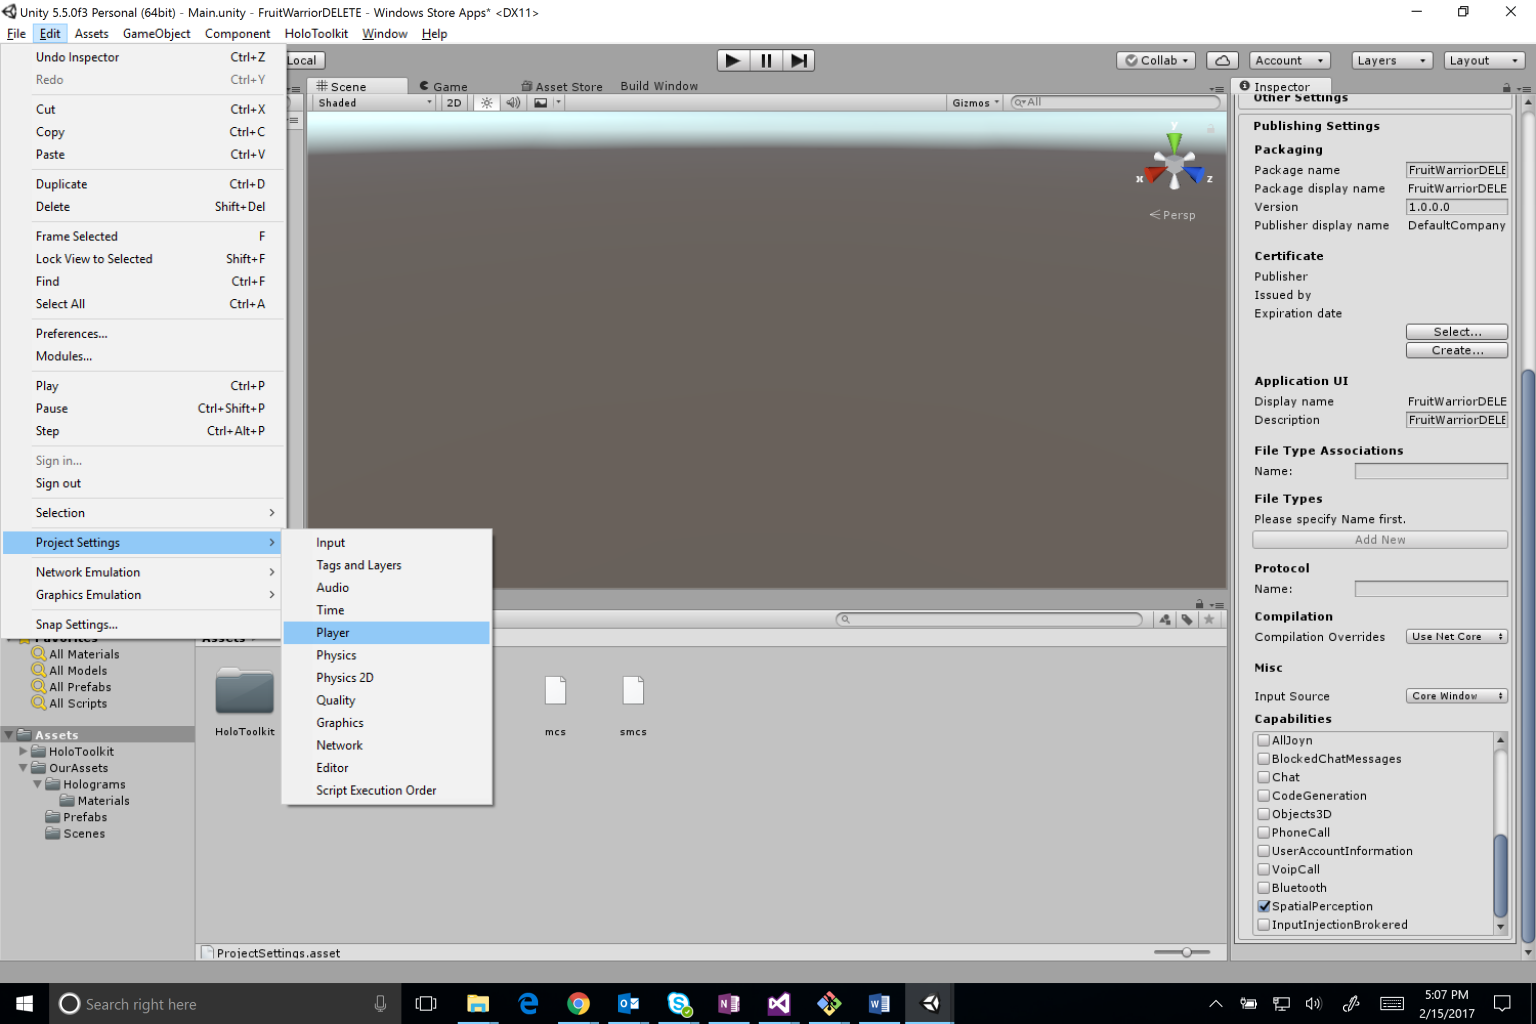
1. Add the Spatial Perception capability in your app, in Unity under Edit -> Project Settings -> Player -> Settings for Windows Store -> Publishing Settings -> Capabilities.
2. Drag the SpatialMapping prefab in Assets: HoloToolkit -> SpatialMapping -> Prefabs into your Hierarchy.
3. Click on the SpatialMapping object in your Hierarchy. In the Inspector on the right side, uncheck Draw Visual Meshes under Spatial Mapping Manager.
4. In the Inspector, change Triangles per Cubic Meter to 1500 and Time Between Updates to 2. This will give us a denser and more frequently updated world mesh.
Spawn Fruit
Now that our world is set up, it’s time to make some falling fruit! Feel free to use the finished scripts in the Github repo, or follow along.
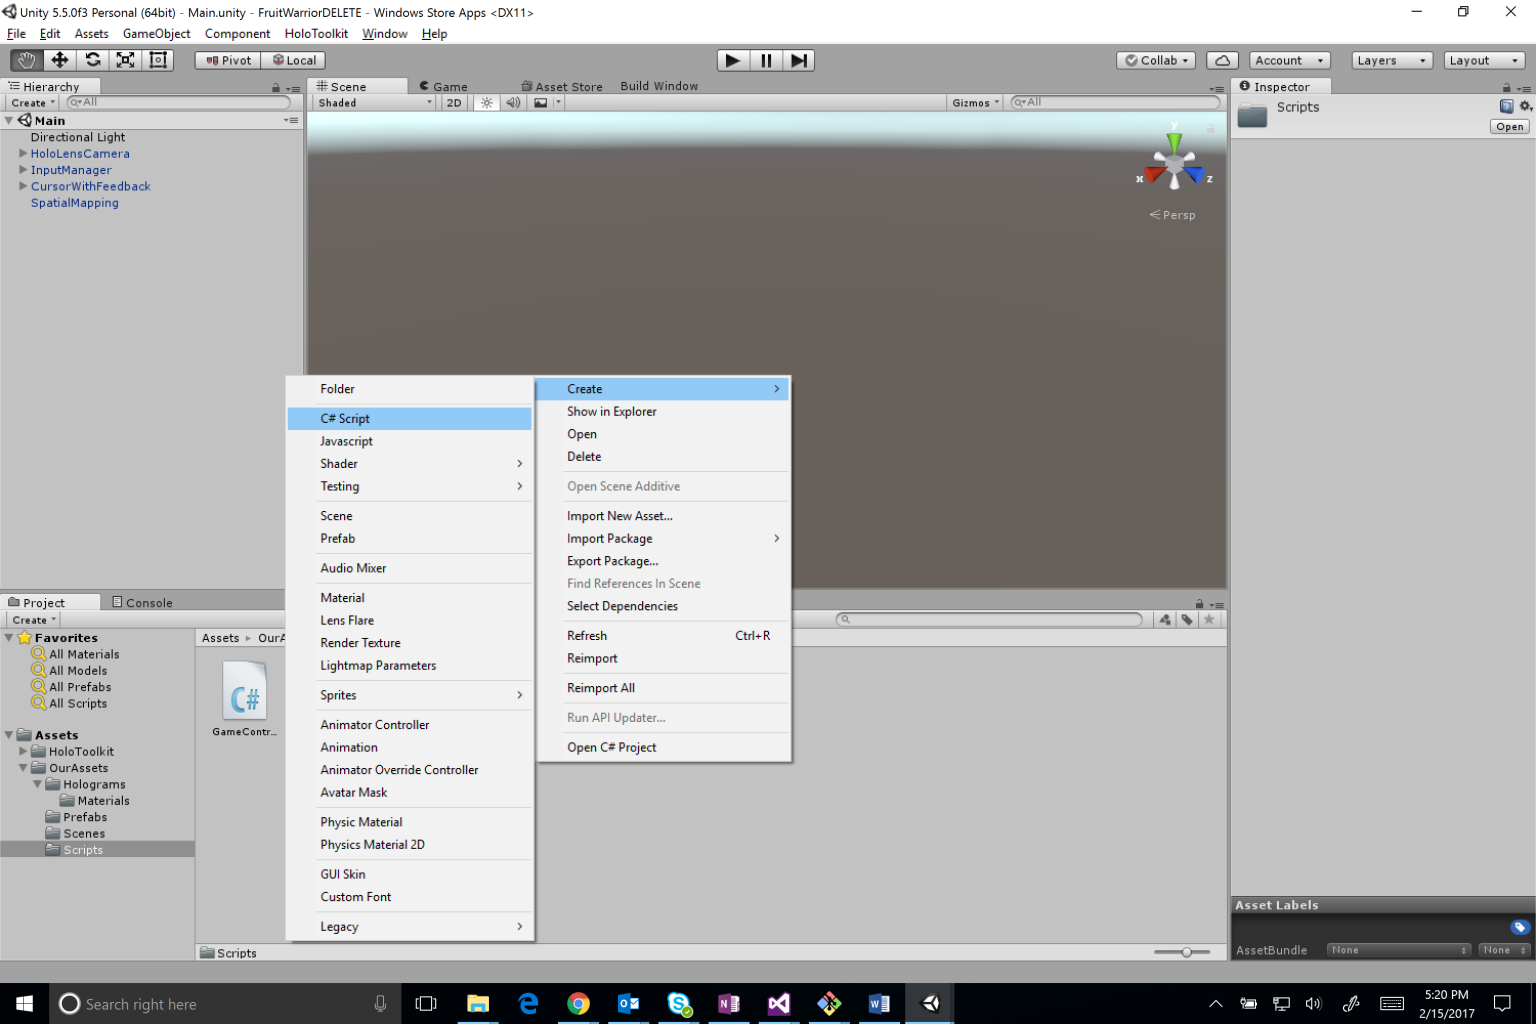
1. Create a new folder in “OurAssets” called “Scripts”.
- In the “Scripts” folder, create a new C# script called GameController.
2. Add code to spawn waves of fruit.
using System.Collections;
using System.Collections.Generic;
using UnityEngine;

public class GameController : MonoBehaviour {

    public float leftWidth;
    public float rightWidth;
    public float height;
    public float awayDepth;

    //The fruit prefabs we'll drop- set in the Unity editor
    public GameObject[] fruits;

    //Score/Timer
    private int score;
    private float timer;

    //List of spawned fruits in play
    List<GameObject> spawnedFruits;

    // Use this for initialization
    void Start () {
        //Set score and timer to start values
        score = 0;
        timer = 120f;

        spawnedFruits = new List<GameObject>();

        //Values chosen to spawn near view frame. Feel free to play around with them.
        var cam = Camera.main;
        leftWidth = cam.transform.position.x - 1;
        rightWidth = cam.transform.position.x + 1;
        height = cam.transform.position.y + 1.5f;
        awayDepth = cam.transform.position.z + 2;

        //Start spawning fruits
        StartCoroutine(SpawnWaves());
    }

    //Spawn fruits
    IEnumerator SpawnWaves()
    {
        var cam = Camera.main;
        while (true)
        {
            //Spawn the fruit within the player's view
            Vector3 spawnPosition = new Vector3(Random.Range(leftWidth, rightWidth), height, Random.Range(awayDepth, awayDepth + 2));

            //Instatiate random fruit
            spawnedFruits.Add(Instantiate(fruits[Random.Range(0, 6)], spawnPosition, Random.rotation));

            //Wait before spawning another
            yield return new WaitForSeconds(3f);
        }
    }
}
3. Create a new empty game object named GameController and give it the GameController tag.
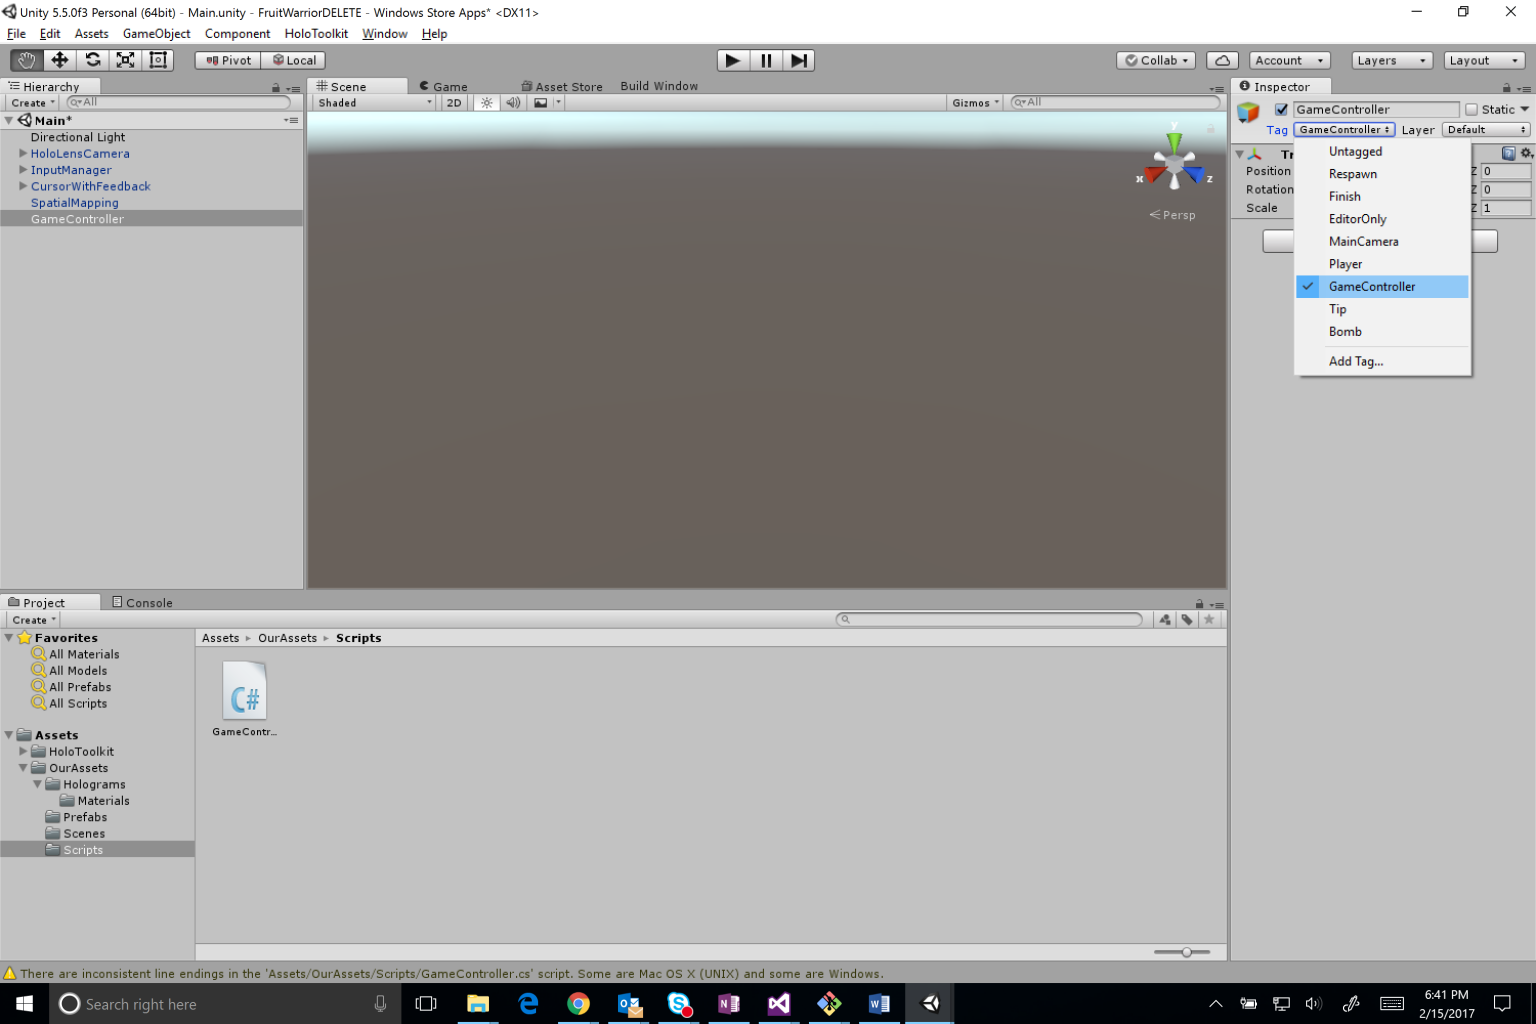
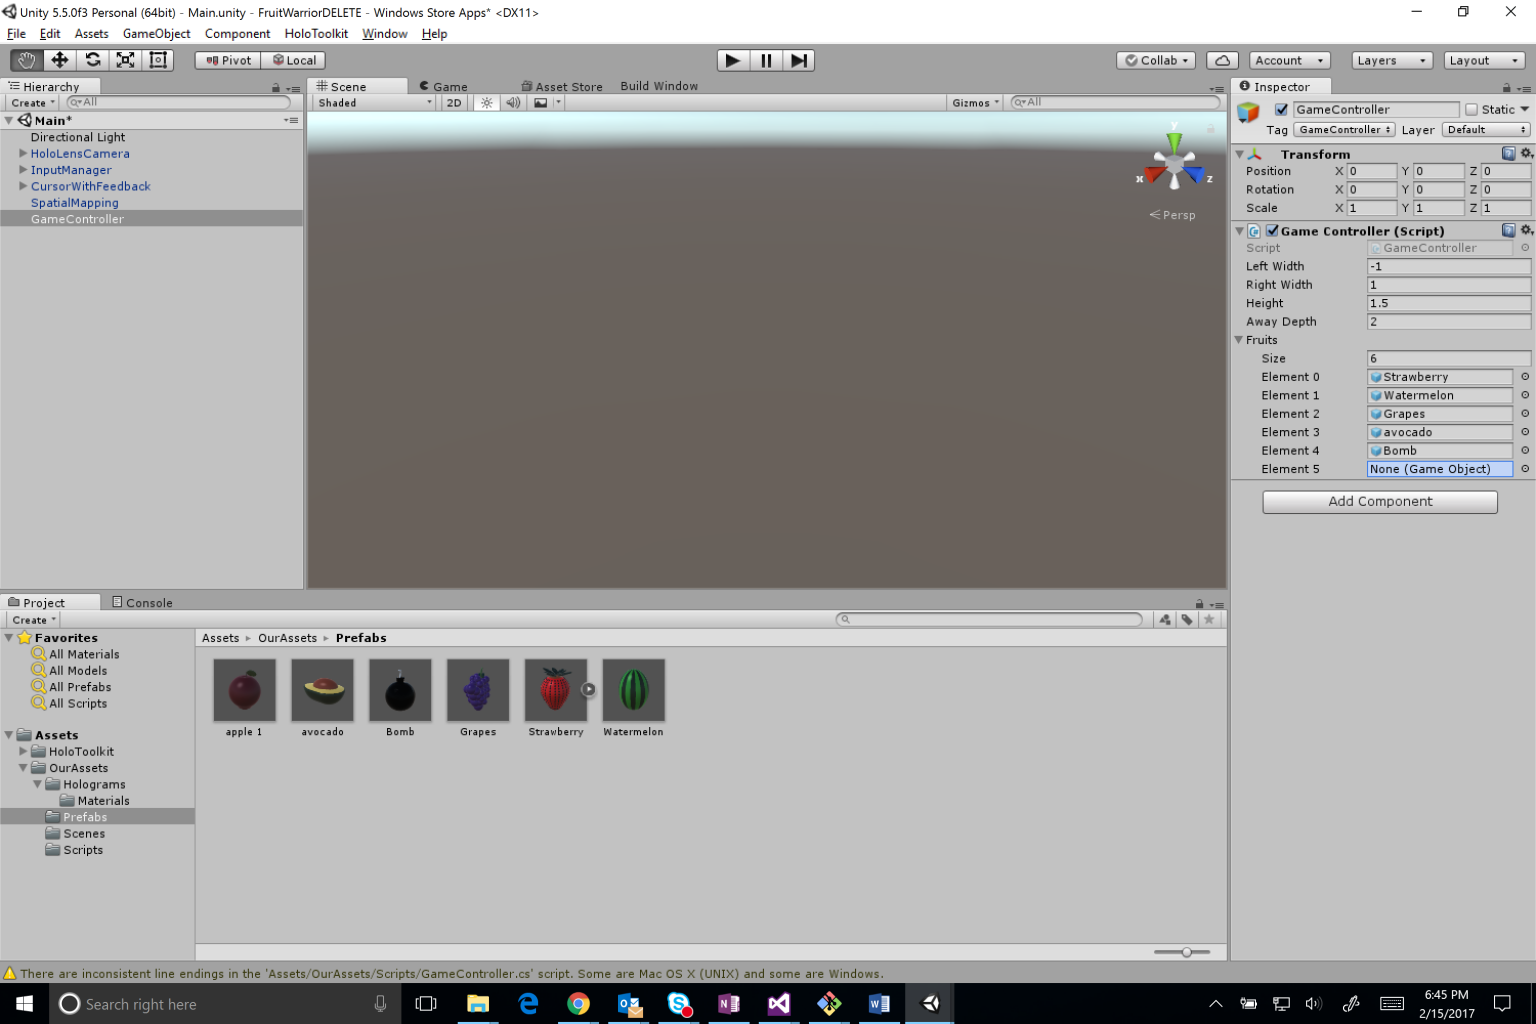
4. Drag the GameController script onto the GameController Object.
- Set the values as per the picture below.
5. If you play your game on the emulator or device, fruit will spawn and bounce off the floor.
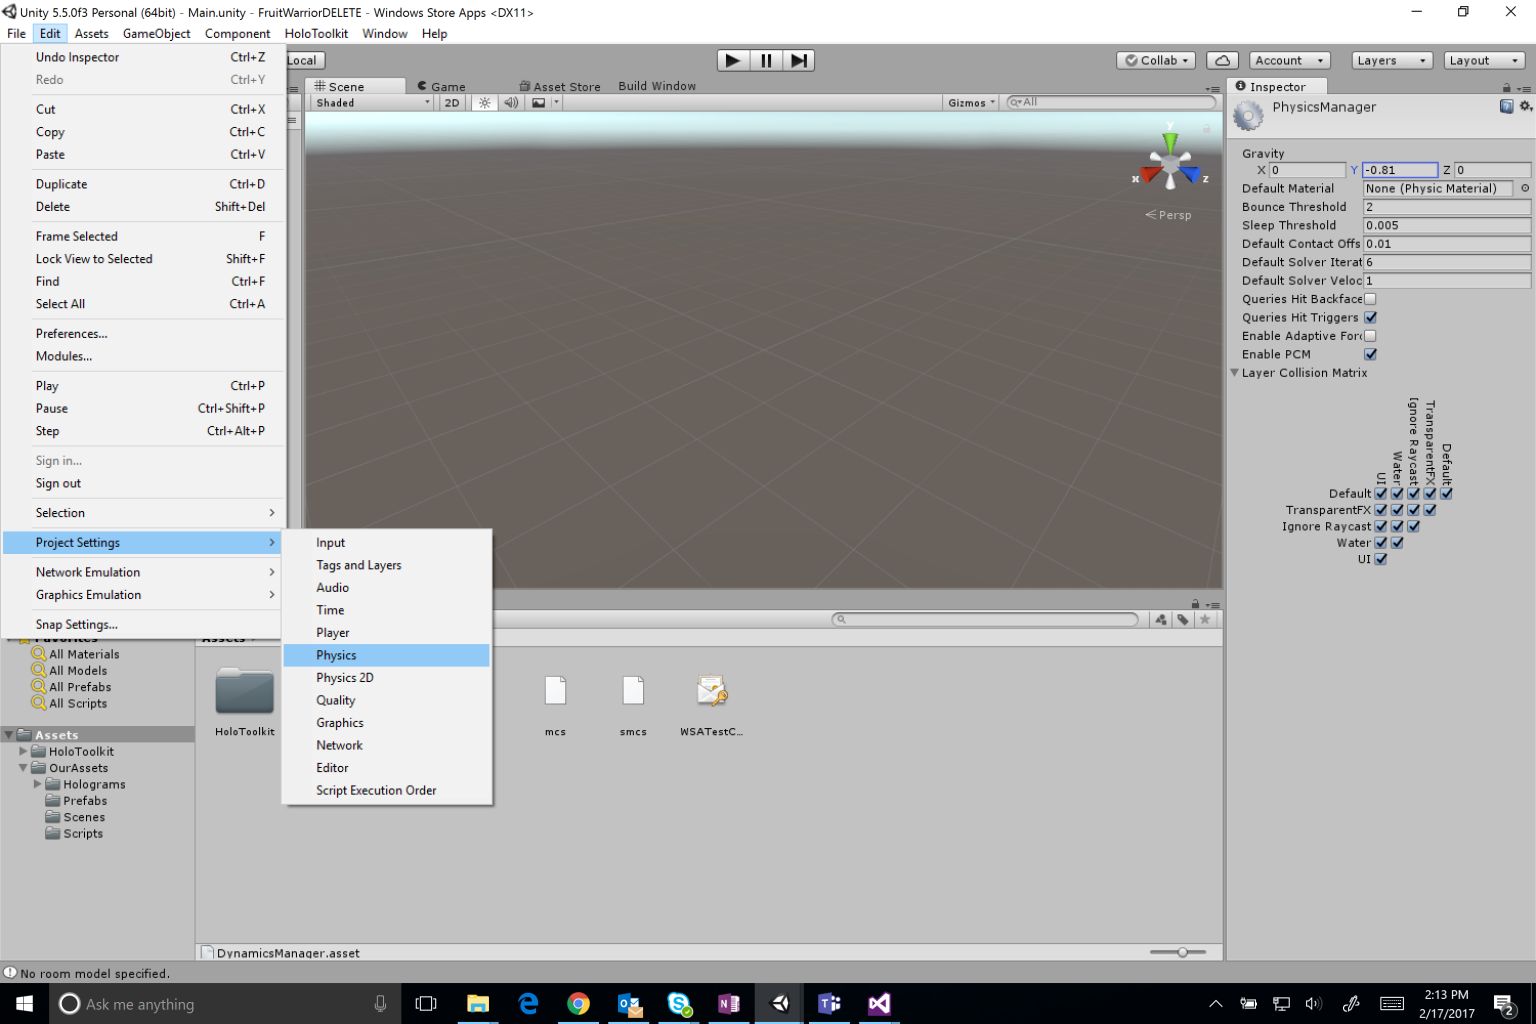
- But that fruit is falling really fast! Let’s change the gravity so the fruit falls slower.
- In Menu:Edit->Project Settings->Physics, change Gravity Y from -9.81 to -.81.
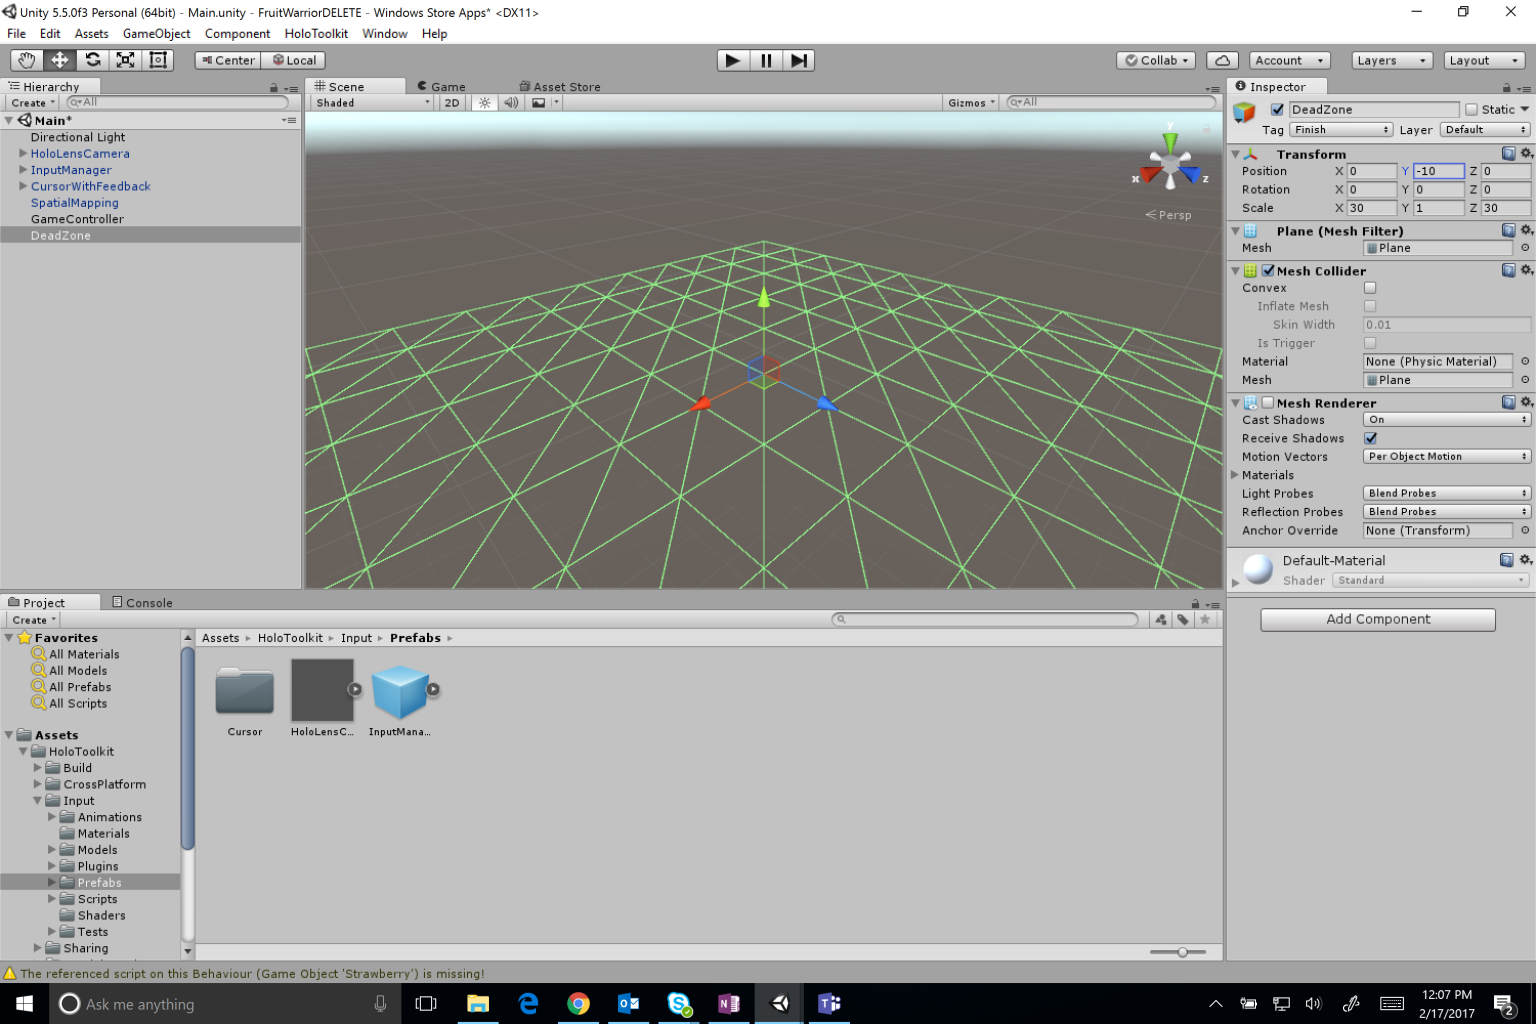
**Awesome! But now fruit will fall forever if they don’t bounce off the floor (accidents happen). Let’s put in a “deadzone” to delete fruit that’s falling forever. **
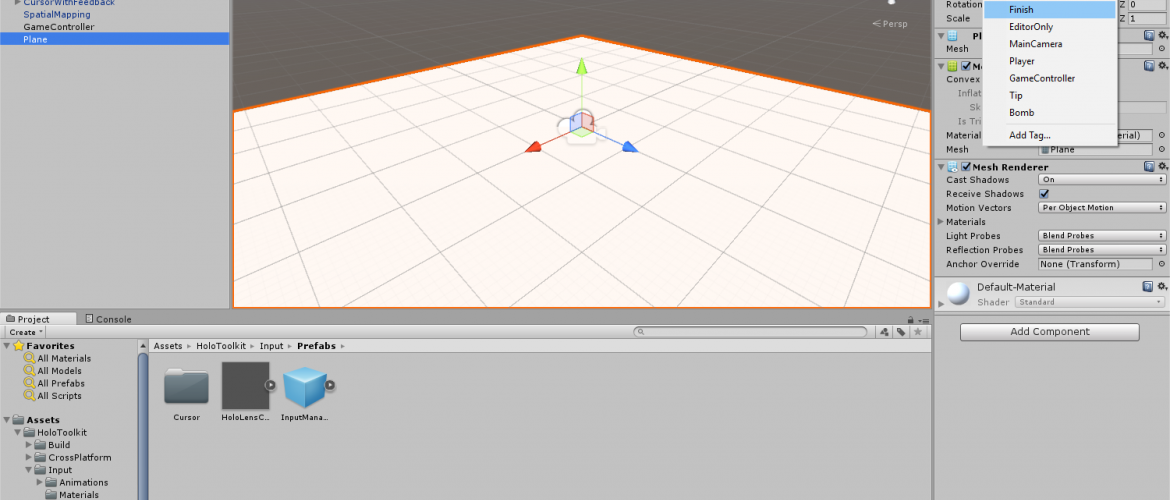
Create a new 3D Plane named DeadZone, and give it the “Finish” tag. Change its Position to X: 0 Y: -10 Z: 0 and scale to X: 30 Y: 1 Z: 30 to make it 30×30 meters and 10 meters below your head. Then uncheck the Mesh Renderer to make it invisible.
Game Logic
We have most of the pieces, now it’s time to put them together!
1. In our GameController script, we’re going to add a couple of new things.
- We’re going to add some logic to have a timer count down until the end of the level, a function that will add to our score when we get a fruit, and a function that will clear the field if we tap a bomb.
//Adds Score when tapping fruit
public void AddScore()
{
    score += 100;
}

//This function is called every fixed framerate frame
void FixedUpdate()
{
    //Update Timer and Screen Text
    timer -= Time.deltaTime;
}

//Called by bomb to clear field
public void BombClear()
{
    while (spawnedFruits.Count > 0)
    {
        Destroy(spawnedFruits[0]);
        spawnedFruits.RemoveAt(0);
    }

    //Take away time and score
    timer -= 30;
    score -= 500;
}
You might have noticed if you click on any of the fruit/bomb prefabs, there’s a “missing script” in the Inspector. We’re going to fix that now!
2. In the OurAssets -> Scripts folder, create a new C# script named FallingObjects.
- (Or drag and drop the FruitFall script from the finished Github repo. We’ll be attaching the script to the bomb, which is not a fruit- hence the name change.)
- The script below will destroy the gameobject it’s attached to (the fruit/bomb) if it collides with the deadZone and will react if it’s tapped, either triggering the BombClear() method or adding to our score.
- We’re using the IInputClickHandler interface provided to us by the HoloToolkit to recognize the click/tap gesture. You can read more about that here.
using HoloToolkit.Unity.InputModule;
using System.Collections;
using System.Collections.Generic;
using UnityEngine;

public class FallingObjects : MonoBehaviour, IInputClickHandler{

    //Variables
    private GameController gameController;

    // Use this for initialization
    void Start () {

        //Get GameController
        GameObject gamecontroller = GameObject.FindGameObjectWithTag("GameController");
        gameController = gamecontroller.GetComponent<GameController>();
    }

    /*Implements IInputClickHandler, which handles click events. Will add to score and set off bomb.*/
    public void OnInputClicked(InputEventData eventData)
    {
        //Check to see if bomb- deletes all fruits
        if (gameObject.tag.Equals("Bomb"))
        {
            //Play bomb sound
            gameController.BombClear();
        }
        else
        {
            //Add to Score
            gameController.AddScore();

            Destroy(gameObject);
        }

    }

    void OnCollisionEnter(Collision collision)
    {
        //Destroy before they fall forever
        if (collision.gameObject.tag == "Finish")
        {
            Destroy(gameObject);
        }
    }
}
3. Drag the FallingObjects script onto each prefab where it says “Missing Script”.
Spatial Sound
Now that our fruit is falling, we have no idea where they are! Sound will help us pinpoint where around us the fruit is falling.
1. Make a new folder in “OurAssets named “Sounds”. Drag the files from the “Sounds” folder in the finished Github repo, into our newly created Sounds folder.
- You can also use your own “bomb explosion” sound and “falling” sound.
2. In Unity select from the top menu Edit > Project Settings > Audio.
- In the Inspector Panel on the right side, find the Spatializer Plugin setting and select MS HRTF Spatializer.

3. On each fruit/bomb prefab, there should be an Audio Source. Change these things for each one (or change for one and copy/paste):
- Drag fallingsound1.wav from the “Sounds” folder onto AudioClip.
- Check the Spatialize property.
- Check the Play On Awake.
- Change Spatial Blend to 3D by dragging the slider all the way to the right. The value should change from 0 to 1 when you move the slider.
- Expand 3D Sound Settings, and enter 0.1 for Doppler Level.
- Set Volume Rolloff to Logarithmic Rolloff.
- Set Max Distance to 20.
4. Click on the GameController prefab in the Hierarchy, and add an Audio Source component with the same values as the prefab, but change the AudioClip set to “bombsound.wav” and uncheck Play On Awake.
5. Now we’re going to add some logic to our scripts to determine when we should or shouldn’t play the sounds. In the FallingObject script, add an AudioSource objectSound variable, get the sound in Start(), and pause it if we hit the ground.
//...

    //Variables
    private GameController gameController;
    private AudioSource objectSound;

 void Start () {

        //Get GameController
        GameObject gamecontroller = GameObject.FindGameObjectWithTag("GameController");
        gameController = gamecontroller.GetComponent<GameController>();

        //Get falling sound
        objectSound = gameObject.GetComponent<AudioSource>();
    }

//...

 void OnCollisionEnter(Collision collision)
    {
        //Hit the ground
        objectSound.Pause();

//... et all
In the GameController script, we’ll play the bomb sound when the function BombClear() is called.
//...Variables

    //bomb sound
    private AudioSource bombSound;

//...

void Start () {

        //Get bomb sound
        bombSound = gameObject.GetComponent<AudioSource>();

//...

//Called by bomb to clear field
    public void BombClear()
    {
        bombSound.Play();

//... et all
“Scoreboard”
Let’s display our score and time left to the player! Working with UI text in Unity with the HoloLens is a little different than normal. Luckily, the HoloToolkit has some nifty prefabs we can use! Read more on HoloToolkit UI here!
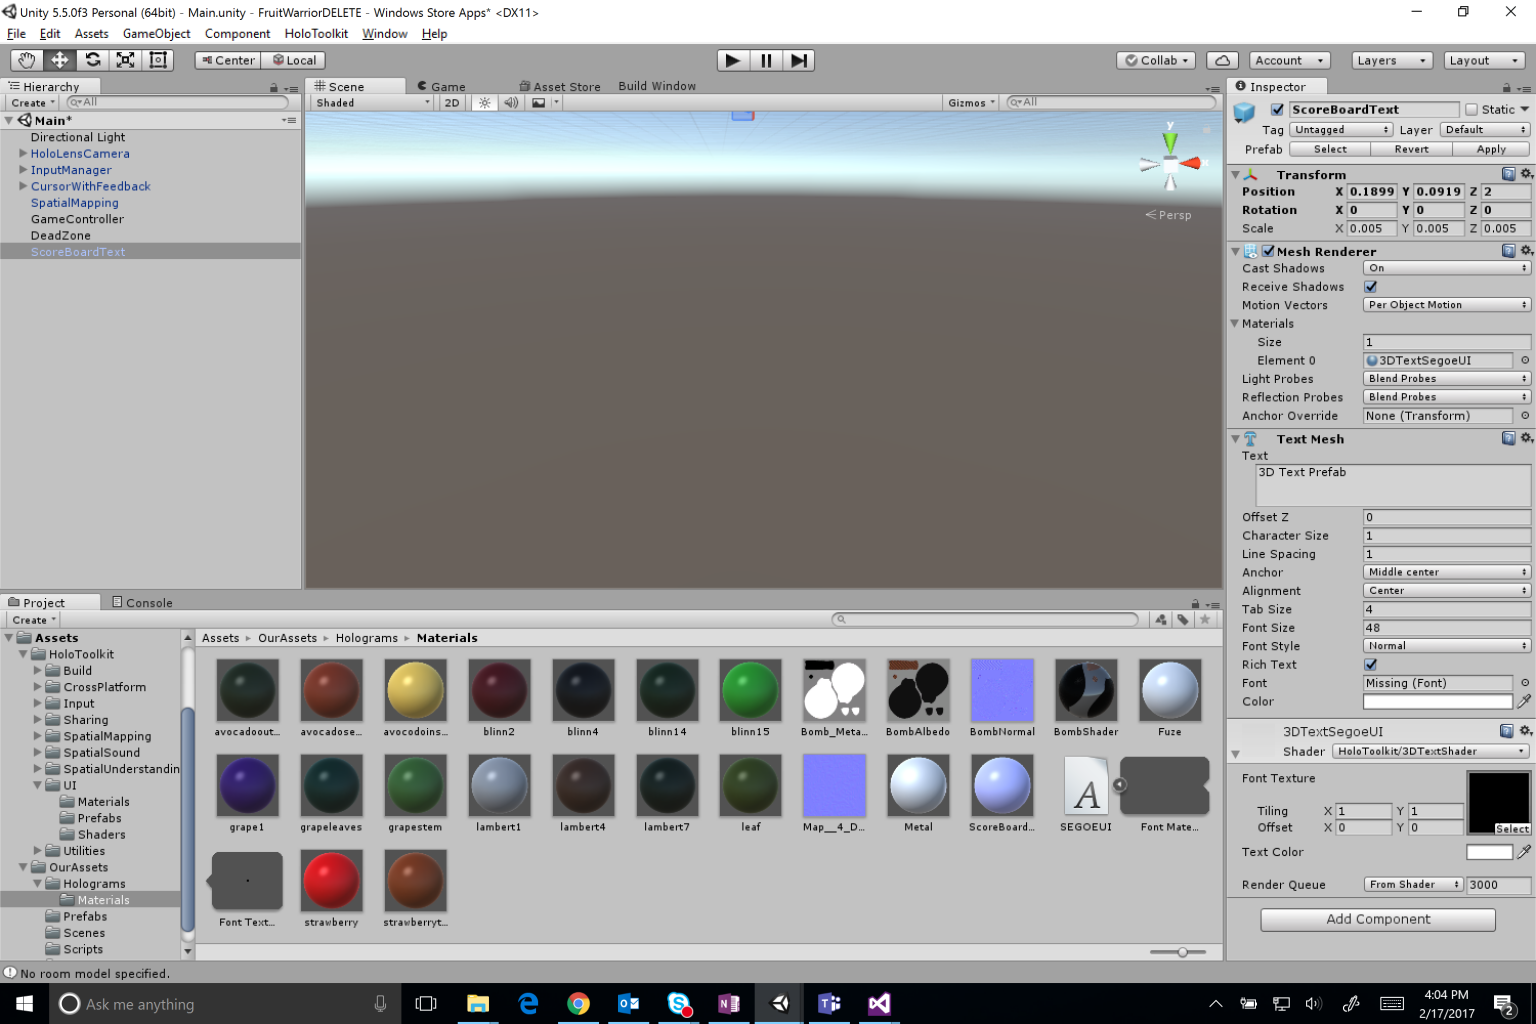
1. Drag the 3DTextPrefab in Assets:HoloToolkit->UI->Prefabs into your Hierarchy and rename it ScoreBoardText.
- Click on ScoreBoardText and click the drop down arrow on the Shader at the bottom of the inspector.
- Import the font you want to use (I already imported Segoe UI in Holograms->Materials) and drag the font texture into the shader.
- See the picture for more detail.
- Also make sure to drag the font (in our case Segoe UI) under “Font” in the Text Mesh component.
2. Set the text in Text Mesh of ScoreBoardText to “Score: 0”.
- Make sure the Z position in the transform is set to 2 and the scale values for X, Y, and Z are all 0.009.
3. Duplicate (ctrl+D) ScoreBoardText and rename it Timer.
- Change the text in Text Mesh to “Timer: 120” and set its Y Position to 0.05.
4. Now we edit our scripts to update the text game objects to reflect our time and score.
- Our main addition to GameController is adding and calling UpdateTextDisplay(), which updates the text game object with our values.
using System.Collections;
using System.Collections.Generic;
using UnityEngine;

public class GameController : MonoBehaviour {

    public float leftWidth;
    public float rightWidth;
    public float height;
    public float awayDepth;

    //The fruit prefabs we'll drop- set in the Unity editor
    public GameObject[] fruits;

    //Update ScoreBoard/timer
    public GameObject ScoreBoardText;
    public GameObject TimerText;

    //Score/Timer
    private int score;
    private float timer;
    //Reference to Text UI control where the score should be displayed
    private TextMesh scoreMesh;
    private TextMesh timerMesh;

    //bomb sound
    private AudioSource bombSound;

    //List of spawned fruits in play
    List<GameObject> spawnedFruits;

    // Use this for initialization
    void Start()
    {
        //Start score at 0 and display
        score = 0;
        scoreMesh = ScoreBoardText.GetComponent<TextMesh>();
        UpdateTextDisplay();

        timer = 120f;
        timerMesh = TimerText.GetComponent<TextMesh>();

        spawnedFruits = new List<GameObject>();

        //Get bomb sound
        bombSound = gameObject.GetComponent<AudioSource>();

        //Values chosen to spawn near view frame. Feel free to play around with them.
        var cam = Camera.main;
        leftWidth = cam.transform.position.x - 1;
        rightWidth = cam.transform.position.x + 1;
        height = cam.transform.position.y + 1.5f;
        awayDepth = cam.transform.position.z + 2;
        StartCoroutine(SpawnWaves());

    }

    //Adds Score when tapping fruit
    public void AddScore()
    {
        score += 100;
        UpdateTextDisplay();
    }

    void FixedUpdate()
    {
        //Update Timer and Screen Text
        timer -= Time.deltaTime;
        timerMesh.text = "Time: " + Mathf.Round(timer);

    }

    //Puts text on screen
    private void UpdateTextDisplay()
    {
        string displayString = "Score: " + score.ToString();

        if (scoreMesh != null)
        {
            scoreMesh.text = displayString;
        }
    }

    //Called by bomb to clear field
    public void BombClear()
    {
        bombSound.Play();

        while (spawnedFruits.Count > 0)
        {
            Destroy(spawnedFruits[0]);
            spawnedFruits.RemoveAt(0);
        }

        //Take away time and score
        timer -= 30;
        score -= 500;
        UpdateTextDisplay();
    }

    //Spawn fruits
    IEnumerator SpawnWaves()
    {
        var cam = Camera.main;
        while (true)
        {
            //Spawn the fruit within the player's view
            Vector3 spawnPosition = new Vector3(Random.Range(leftWidth, rightWidth), height, Random.Range(awayDepth, awayDepth + 2));

            //Instatiate random fruit
            spawnedFruits.Add(Instantiate(fruits[Random.Range(0, 6)], spawnPosition, Random.rotation));

            //Wait before spawning another
            yield return new WaitForSeconds(3f);
        }
    }
}
5. Save your code and switch back to the Unity editor.
- When you click on the GameController object, you’ll see in the Inspector that two new fields popped up in the GameController script.
- Drag the ScoreBoardText and Timer game objects from the Hierarchy into those fields. They’ll now update!
Voice Commands
Now for some extra fun. We’re going to add in a couple of voice commands to enrich our experience. If you want to learn more about this topic, check out the Voice module on Holographic Academy.
1. Open up the project settings where we enabled Spatial Perception.
- Enable the Microphone capability so we can hear voice commands.
2. Make a new Scene named Menu and save it in your Scenes folder.
- Open the Menu scene if you haven’t yet.
3. Bring up the Build Settings under Menu: File -> Build Settings.
- Make sure your Menu scene is added to the Scenes In Build (click Add Open Scenes to add it) and make sure Menu is before Main so it loads first.
4. Once again, delete the main camera and add the HoloLensCamera prefab, the InputManager prefab, and the CursorWithFeedback prefab.
5. We’re going to make a “button” that we can tap to start the game, but also responds to a voice command to start as well!
6. Make a 3D cube named Button and set its Transform Position to X: 0 Y: 0 Z: 2 and its Scale to X: 0.5 Y: 0.2 Z: 0.01.
7. Drag the 3DTextPrefab into the Hierarchy once more, and rename the game object to StartText.
- Make sure to change the font settings to Segoe UI or the font of your choice.
- Change the text mesh to say:
- Look Around The Room!
- Then Tap To Start
- (Or say “Start Game”)
7. Create a new C# script in your scripts folder called MenuButton.
- Drag the MenuButton script onto the Button (cube) game object. The script is as follows:
using HoloToolkit.Unity.InputModule;
using System.Collections;
using System.Collections.Generic;
using UnityEngine;
using UnityEngine.SceneManagement;

public class MenuButton : MonoBehaviour, IInputClickHandler{

    public void OnInputClicked(InputEventData eventData)
    {
        SceneManager.LoadScene("Main");
    }

    void OnStart()
    {
        SceneManager.LoadScene("Main");
    }

}
8. Now our button will start the game if tapped! But we also want it to respond to voice.
- Create another C# script named SpeechManager and also drag it onto the button game object.
- When we say “Start Game”, it will broadcast calling the “OnStart” function, which we have in the MenuButton script.
- We also have some other keywords that’ll be used during the game.
using System.Collections.Generic;
using System.Linq;
using UnityEngine;
using UnityEngine.Windows.Speech;

public class SpeechManager : MonoBehaviour
{
    KeywordRecognizer keywordRecognizer = null;
    Dictionary<string, System.Action> keywords = new Dictionary<string, System.Action>();

    // Use this for initialization
    void Start()
    {
        keywords.Add("Start Game", () =>
        {
            // Call the OnStart method on every descendant object.
            this.BroadcastMessage("OnStart");
        });
        keywords.Add("Restart Game", () =>
        {
            // Call the OnReset method on every descendant object.
            this.BroadcastMessage("OnRestart");
        });
        keywords.Add("Main Menu", () =>
        {
            // Call the OnMenu method on every descendant object.
            this.BroadcastMessage("OnMenu");
        });

        keywords.Add("Show Grid", () =>
        {
            // Call the ShowGrid method on every descendant object.
            this.BroadcastMessage("ShowGrid");
        });
        keywords.Add("Hide Grid", () =>
        {
            // Call the HideGrid method on every descendant object.
            this.BroadcastMessage("HideGrid");
        });

        // Tell the KeywordRecognizer about our keywords.
        keywordRecognizer = new KeywordRecognizer(keywords.Keys.ToArray());

        // Register a callback for the KeywordRecognizer and start recognizing!
        keywordRecognizer.OnPhraseRecognized += KeywordRecognizer_OnPhraseRecognized;
        keywordRecognizer.Start();
    }

    private void KeywordRecognizer_OnPhraseRecognized(PhraseRecognizedEventArgs args)
    {
        System.Action keywordAction;
        if (keywords.TryGetValue(args.text, out keywordAction))
        {
            keywordAction.Invoke();
        }
    }
}
9. Switch back to the “Main” scene (your main gameplay level).
- Drag the Speech Manager script onto your GameController object.
10. As you might have seen in the Speech Manager script above, there are a couple of voice commands that we haven’t yet coded in.
- We’ll be adding two functions to the GameController script, OnRestart() and OnMenu(), so that “Restart Game” will restart the game and “Main Menu” will take us back to the main menu.
- We’ll also update FixedUpdate() so that we go back to the main menu when the game ends.
using UnityEngine.SceneManagement;
//...
void FixedUpdate()
{
//Update Timer and Screen Text
timer -= Time.deltaTime;
timerMesh.text = "Time: " + Mathf.Round(timer);
if (timer <= 0)
{
OnMenu();
}
}
//...
//Voice command for reseting level
void OnRestart()
{
SceneManager.LoadScene("Main");
}
//Voice command for loading menu
void OnMenu()
{
SceneManager.LoadScene("Menu");
}
[/csharp]
</li>
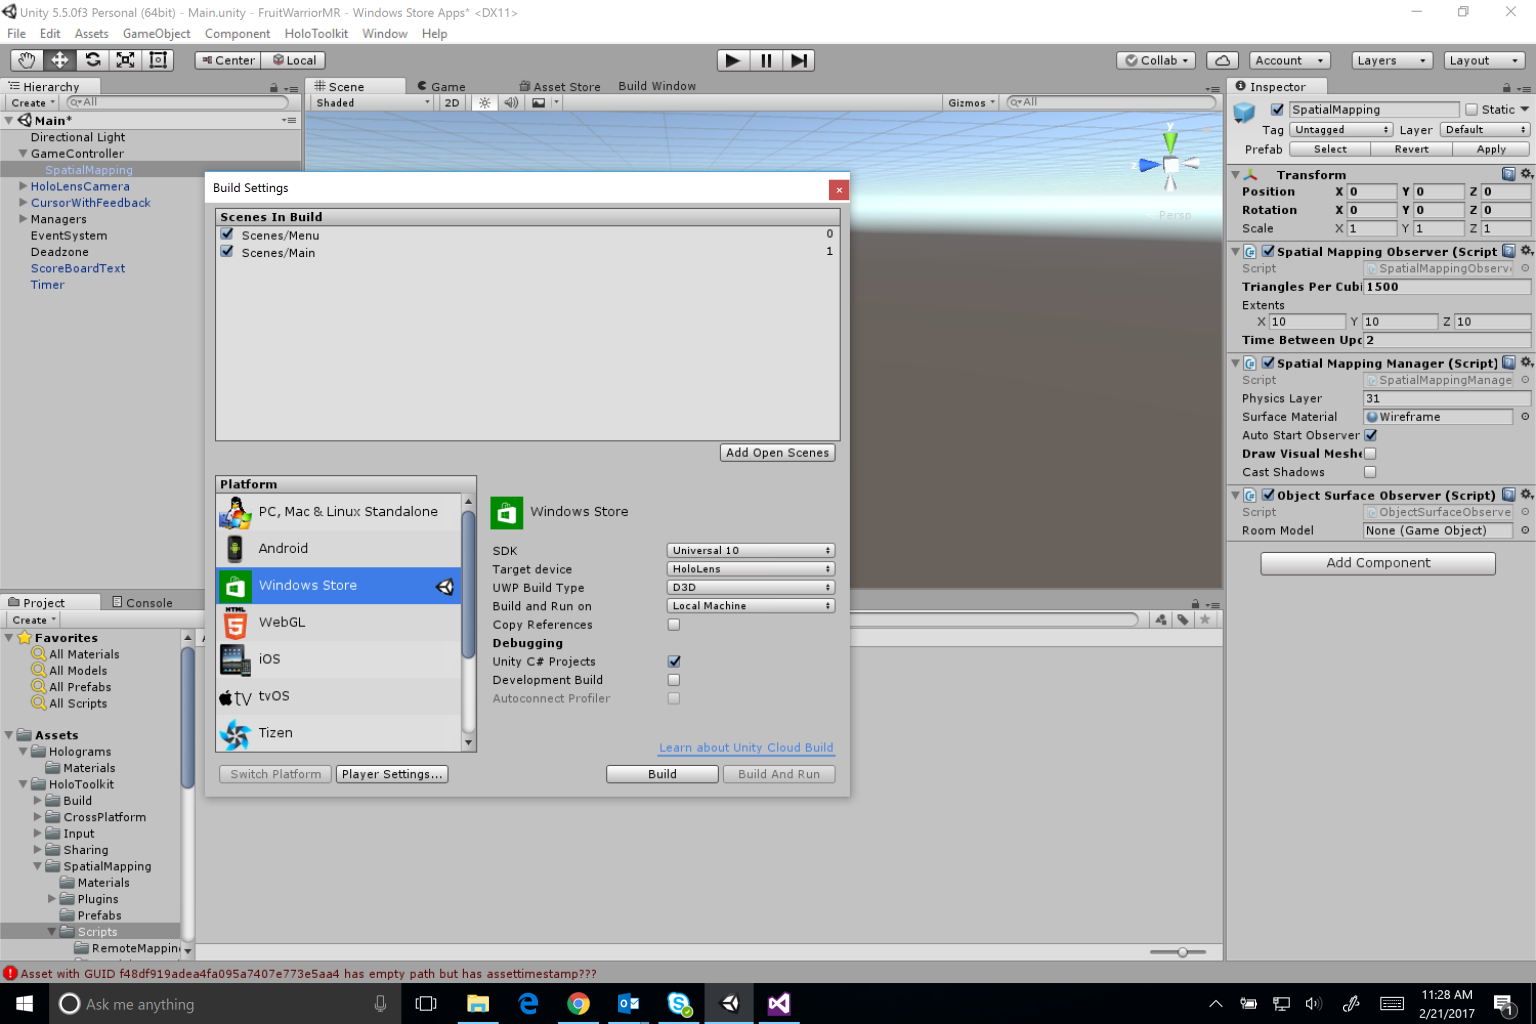
<li>Final step! Let's add functionality to be able to view our spatial map in game! In the Hierarchy, drag the SpatialMapping game object over the GameController object until it's highlighted- there should now be a dropdown arrow next to GameController with SpatialMapping under it (see picture below). Doubleclick the Spatial Mapping Manager script on the SpatialMapping game object to open in the editor. Add these two functions after the last function in the script.
[csharp]
//Called by voice command- Shows visual mesh
void ShowGrid()
{
drawVisualMeshes = true;
}
//Called by voice command- Hides visual mesh
void HideGrid()
{
drawVisualMeshes = false;
}

Play Your Game!
And that’s it! Play your game! Your Fruit Warrior MR game should open at the Main Menu, start by tapping or voice command, spawn fruit with spatial sound for 120 seconds, clear the field and dock your time/score when you tap a bomb, show/hide the spatial mapping mesh, and show your score and time!
What’s Next To practice game design- there’s many ways to to improve the game right here.
- Add feedback for the user after a fruit is tapped (eg. sound effect, visual effect like poof of smoke, animation, etc).
- Add power-ups that change gameplay, like spawn fruit faster or slower, add more bombs, increase points.
- Create an online leaderboard for top scores!
- Add a soundtrack and more levels! More HoloLens- there are more tutorials on the Holographic Academy website. After you’ve completed the tutorials, try making your own apps for HoloLens that expand on aspects we touched on, such as more gestures, or Placement or Occlusion in spatial mapping.